Showing posts with label accessories. Show all posts

Monday, November 19, 2012

Finished project: Staghorn cabled scarves

After a failed scarf that I made for my hubby, I looked around for a more masculine scarf pattern that he would wear. Then, I found the Staghorn Cable scarf in the book Son of Stitch and Bitch by Debbie Stoller. I was quite intimidated by the cable needle but after about 4 repeats of the pattern I had this memorized. So much so, that I did two scarves back to back on the bus without even looking up.

Here is scarf #1 which I made for my hubby:


Here is scarf # 2 which is actually for sale (let me know if you want to buy it). I plan on selling it at a craft show this year or giving it away for Christmas.

Sunday, March 4, 2012

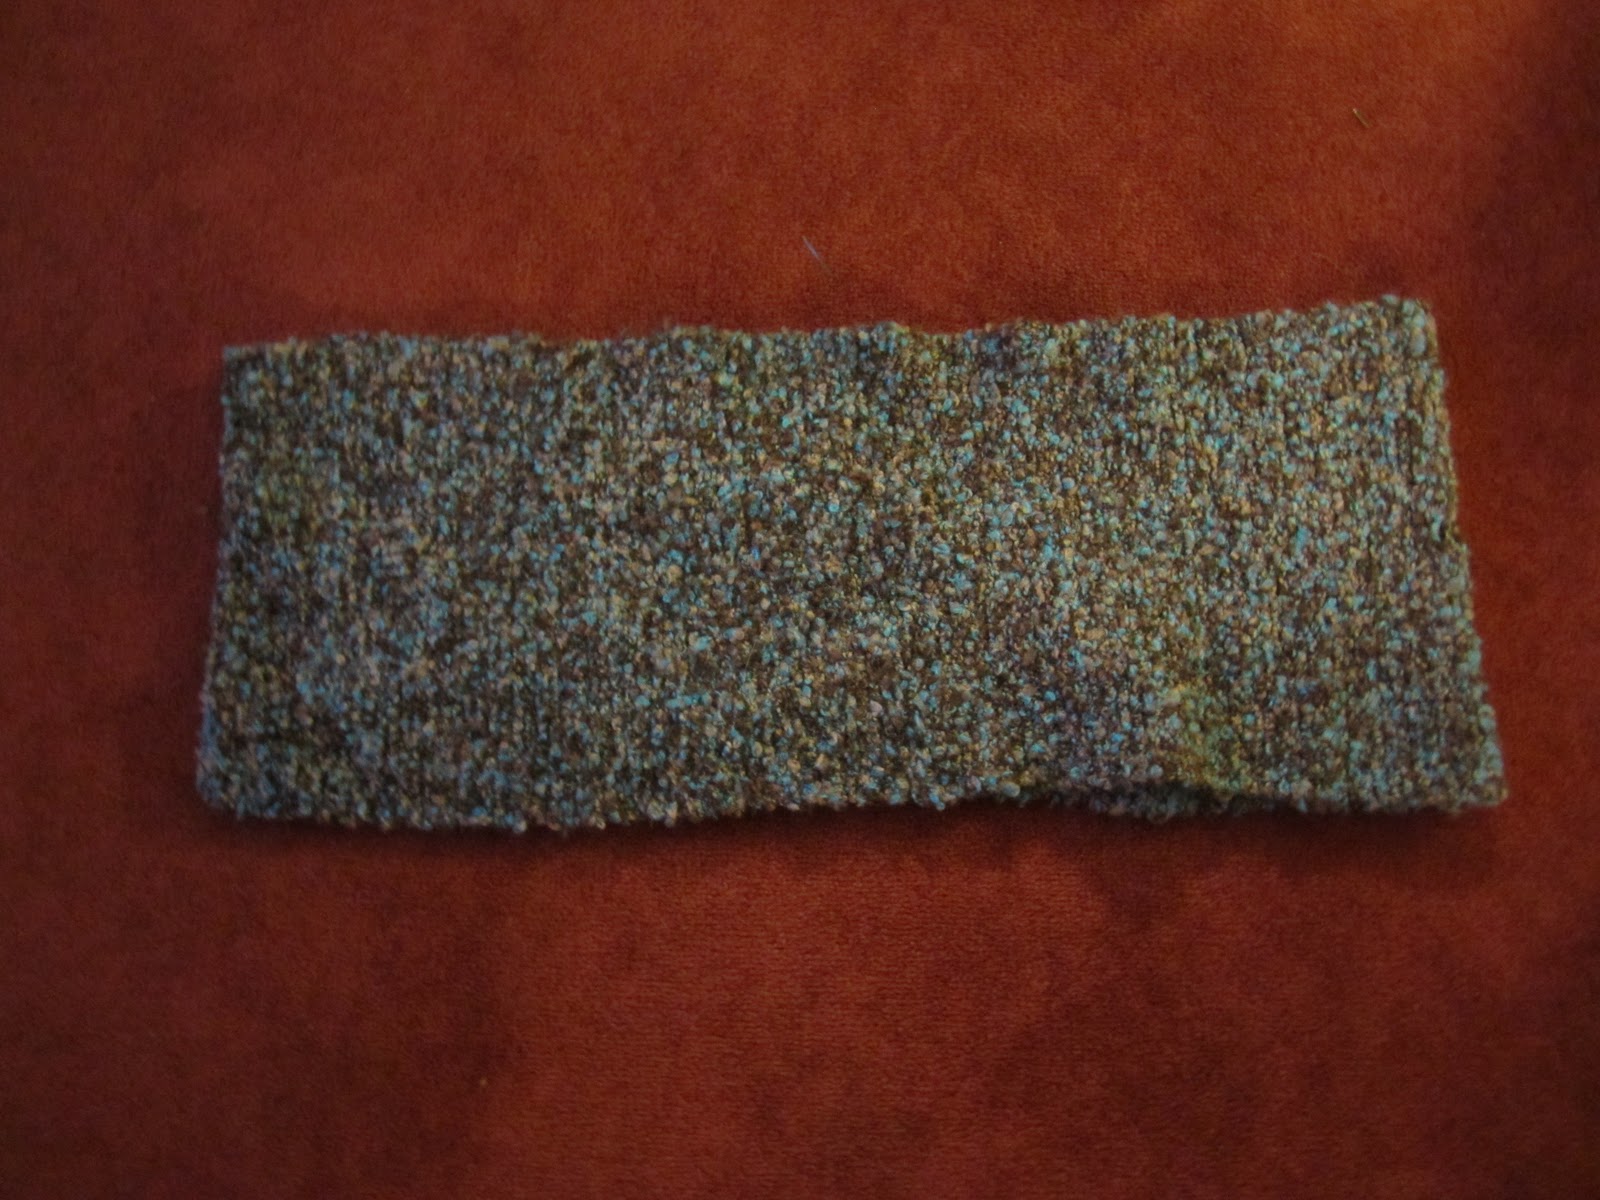
The Dropped-Stitch Earwarmer

This earwarmer is inspired by two things: my love affair with purple and with the dropped stitch pattern. I wanted something to match by scarf but to not stand out or compete with it. So, I came up with this idea. It goes with the dropped-stitch kit that I have been making (scarf, earwarmer and fingerless gloves).


To start, I measured my head with a measuring tape. Mine is 22 1/4 inches so I can start from there. Behind my head from ear to ear, I measure 8 inches.

Abbreviations used in this pattern:
M1R - make 1 right
M1L - make 1 left
YO - yarn over
K - Knit
P - Purl
K2 tog - Knit two together
BO - Bind off

Needles: US8 straight needles
Yarn: Bernat Super Saver worsted weight yarn in lilac-colour

Pattern:

Cast on 10 stitches. Knit for 3 inches or 28 rows.

Row 29: K1, M1R, K8, M1L, K1. You now have 12 stitches.
Row 30: Knit.
Row 31: K1, M1R, K10, M1L, K1. You now have 14 stitches.
Row 32: Knit.
Row 33: K1, M1R, K12, M1L, K1. You now have 16 stitches.
Rows 34-62: Knit.
Row 63: K6, YO once, K1, YO twice, K1, YO three times, K1, YO twice, K1, YO once, K1, K6.
Row 64: Knit and drop all YO.
Rows 65-66: Knit.
Row 67: *K1, YO once, K1, YO twice, K1, YO three times, K1, YO twice, K1, YO once, K1, K6, then repeat from * until end.
Row 68: Knit and drop all YO.
Row 69-117: Knit.
Row 118: *K1, YO once, K1, YO twice, K1, YO three times, K1, YO twice, K1, YO once, K1, K6, then repeat from * until end.
Row 119: Knit and drop all YO.
Row 120-121: Knit.
Row 122: K6, YO once, K1, YO twice, K1, YO three times, K1, YO twice, K1, YO once, K1, K6.
Row 123: Knit and drop all YO.
Rows 124-151: Knit.
Row 152: K1, K2 tog, K10, K2 tog, K1. You now have 14 stitches.
Row 153: Knit.
Row 154: K1, K2 tog, K8, K2 tog, K1. You now have 12 stitches.
Row 155: Knit.
Row 156: K1, K2 tog, K6, K2 tog, K1. You now have 10 stitches.
Rows 157-174: Knit.
Row 175: BO loosely and keep a 12-inch tail.

Sew up the two end pieces using a wool needle and the 12-inch tail then trim off extra thread.


Saturday, January 28, 2012

Purple Chenille Cowl

This is one very cool loopy cowl! I was inspired by the Autumn cowl on Ravelry and this pattern isn't really much different.


Yarn: 2 balls purple chenille yarn (I got mine in a 1lb Factory Ends package from Zellars)
Needle: US 15 (10.0 mm)


 Pattern:

Using two strands of yarn, one from each ball, cast on 25 stitches. Knit (as in, garter stitch) until the piece measures 50 inches long. Bind off. Sew up the two end seams with scrap yarn and a wide knitting needle. Weave in any ends.


Notes:
  • I have no idea of the care instructions for this yarn. I will note though that I will only hand wash this cowl and never put it in the washer or dryer.
  • I found that the yarn tended to get tangled or pulled so I just included that in the fabric. No one will notice a knot or tangle and since the yarn was insisting on doing that anyways, I just went with it.
  • This yarn drove me a little nuts as it would break whenever I pulled on it too hard then I had to weave in ends all of the time. So, I unravelled (gently) as I knit to avoid breakage and that seemed to work. 
  • Another yarn note: it's flimsy. The product doesn't not hold shape like cotton or wool, so it can stretch in any direction. That is perfectly fine though as this is only a cowl.
Ideas:
  • With the leftover yarn, I am pondering making one of these options: an earwarmer, a hat, wristlets or a glasses case. Stay tuned to see how I use up the last of this stuff.

Sunday, January 22, 2012

A realistic wedding timeline

I had almost two years to plan my wedding. Now that we are married, I can reflect on when things got done along with what things I should have done and when. I will write them all in this timeline.

I find the timelines in wedding magazines include things that you do not need: for example, you don't need a videographer or a wedding planner. So, here's a timeline put together from my own experience as a recent bride.

12 months before wedding:
  • Decide on your wedding colours and theme (if you are having one)
  • Decide on your wedding party (maids or matrons of honour, best man, groomsmen, etc.).
  • Decide on a wedding day.
  • Decide on a wedding venue - and book it.
  • Decide on a reception venue - and book it. Don't worry about the details like the meal or guest list yet, just book the room that holds a good number (ex. 100 seats).
  • Shop around for a photographer and book.
  • Book a florist for the wedding flowers.
Finances for 12 months:
  • Save for confirmation payment on reception, photographer and florist.
11 months before wedding:
  • Fill out the contract and make the confirmation payments for reception, photographer and florist.
  • Brainstorm a venue for the photo session. Talk to your photographer for ideas.
  • Brainstorm what you want to do for wedding favours.
  • Brainstorm any activities you want to do for your reception (games, activities, etc.).
  • Book your transportation for the day of the wedding. Get an appoximate quote and the preferred payment method.
  • Shop around for a wedding dress. Have your first (first of many) "Oh my god, I can't believe this is happening" moment.
Finances for 11 months:
  • Make confirmation payment for reception, photographer and florist (about $800 total). If this is required for your transportation, then do that as well.
10 months before wedding:
  • If you are making anything for your wedding, time to finalize what you want to make, what it looks like and what you need to buy in order to make it happen. Buy all of that now (paper, boxes, ribbon, etc.).
  • Brainstorm what you want to give for attendant gifts.
  • Purchase a wedding dress no later than this date because it usually takes at between 4-6 months to make and ship to the wedding store.
Finances for 10 months:
  • Buy wedding dress.
  • Buy anything that you are planning to put together yourself: paper for invitations, boxes, ribbon, etc.
9 months before wedding:
  • Decide on text and design for your wedding invitations.
  • Meet with your officiant and fill out any forms that you need to (if you need to). 
8 months before wedding:
  • Make wedding invitations (if you are making them). If you are ordering them, then send the text and design out now.
  • Talk to the groom about his wedding attire: does he need a new suit? New shoes?
  • Talk to your officiant about if you have to do marriage classes or a session. 
Finances for 8 months:
  • If you are ordering your invitations, you may have to pay for them up-front now.
6 months before wedding:
  • Go to marriage classes with your officiant. Depending on which religion you are (or which church you are getting married in), this may be a one-evening sit-down session or a two-day session.
5 months before wedding:
  • Send out wedding invitations.
  • If your wedding dress has arrived, go in for your fitting. Bring your wedding shoes.
  • If the groom needs any new clothing (suit, shoes, tie, etc.), get it now so that he can have it fitted.
  • Confirm the meal for your reception.
  • Start designing the programs for the wedding ceremony. If you need supplies to make these, buy it now.
  • Confirm the design for wedding favours and buy all materials that you will need to either make them or buy them. 
Finances for 5 months:
  • Buy postage for invitations.
  • Buy supplies for wedding ceremony programs.
  • Buy supplies for wedding favours.
  • Buy groom's attire.
  • Save money for down payment for reception. 

 3 months before wedding:
  • Work on the design for the wedding programs. Figure out how to print it and what it will look like. 
  • If you are a real eager beaver, start designing the Thank You cards as well.
  • If you are changing your name, time to research what needs to be updated (bank accounts and cards, health cards, SIN number, etc.).
  • If you have a will, time to talk to a lawyer about updating it. If you want a prenuptial agreement, time to start planning that as well. 
Finances for 3 months:
  • If you are talking to a lawyer about a will or a prenuptial agreement, you will most likely be discussing fees for this. Expect about $1000 total for each transaction (will and agreement).
2 months before wedding:
  • Research how you go about getting a marriage license. Who do you need to contact, how much is it, how much time does it take for you to actually get it back (ours was five days from the day that it was filled out).
  • Put together a prototype for your wedding favours and talk to friends about an assembly line to make them. Even if you've bought them, you might have some assembly or labeling required. 
Finances for 2 months:
  • Continue to save money for down payment for reception.
1 month before wedding:
  • Get all of your medical appointments (dentist, the doctor, the optometrist, etc) out of the way, that is, if you haven't done so already.
  • Think about what shots you want during the photo session. Write them all down as you think of them. Send to the photographer once the list is complete. 
  • Write down the venues for the ceremony, photo session and reception for out-of-town guests, the transportation and anyone else who asks. Send it to them now.
  • Make your hair and make-up appointment. If you are getting married during the summer, you may need to do this 2 months before the wedding.
  • Continue your RSVP list for the reception.
  • Make attendant gifts (or buy them).
  • Designate someone to pick up the flowers on the day of the wedding and drop them off to the groom and yourself.
  • If you are changing your name, time to fill out some forms.
Finances for 1 month:
  • Make first down payment for your reception. This should be half of the total bill.
  • Make first down payment for your photographer. This should be half of the remaining bill.
  • Buy attendant gifts or the materials required to make them.
  • If you are changing your name, you may have to pay a fee to change your health card, bank cards, etc.
2 weeks before wedding:
  • Fill out forms for the marriage license.
  • Start whitening strips for your teeth. Go for the 14-day whitening strips or have the procedure done at the dentist.
  • Get your highlights and haircut done. Also, if the groom needs the same thing it's time to get it done.
  • Continue your RSVP list for the reception.
  • Check the ceremony program with your officiant one more time.
  • Make your wedding favours (if you are making them) with an assembly line. 
Finances for 2 weeks:
  • Your highlights and haircut. The groom's haircut.
  • Any beauty items: whitestrips, long-lasting make-up, etc.
 1 week before wedding:
  • Pick up marriage license.
  • Do a run-through of your hair with the hair dresser.
  • Finish the program for the ceremony and print off. Assemble. Designate someone to take these to the ceremony and (if there are leftovers) take them to your house after the wedding.
  • Make any signs that you want to display at your house, ceremony, photo shoot and/or reception. Designate someone to put up these signs and to take them down.
  • Submit RSVP list for your reception. Confirm the menu for your reception as well.
  • Designate someone to pick up flowers at the florist and drop them off for the groom and bride. Call the florist to inform them who this person is so that they give the flowers to the right person.
  • Call and confirm details with the limo or transportation that you have hired. Confirm pick-up time, locations (church, photo shoot, reception), drop-off time and method of payment.
Finances for 1 week:
  • Pay for marriage license.
  • Pay for wedding hair and make-up at the run-through so that you don't have to on the day of the wedding.
  • Make second and last payment for the flowers.
 Two days before wedding:
  • Pick up wedding dress and get all bridesmaid's dresses steamed. Hang dress up in a room that is closed off from kitchen and bathroom odors (and peeking grooms).
 Day before wedding:
  • Do a rehearsal with the officiant, wedding party and musician.
  • Have a rehearsal supper with closest family, friends and the wedding party.
  • Have a manicure or pedicure.
  • Prepare food for the wedding day (think of breakfast, lunch and a snack).
Finances for one day:
  • Pay musician(s).
  • Pay officiant with a thank you card.
  • Pay for manicure or pedicure (unless you are doing it at home).
  • Pay for food at the rehearsal supper (if it is at home). If it is in a restaurant, everyone pays for their own food.
Wedding day:
  • Get hair and make-up done. 
  • Flowers are dropped off.
  • Put dresses on.
  • Get married!
  • Photo shoot
  • Reception
 Finances for wedding day:
  • Pay limo or transportation (most likely in cash).
4-6 weeks after wedding:
  • Confirm and update your will with a lawyer.
  • View photo proofs and decide on which ones to develop.
  • Start Thank You cards.
  • Update your accounts with the status "married". You may need to update information at work, at the bank, etc.
  • Get your marriage certificate in the mail. You might need it for your will or prenuptial agreement, or to change your name.
Finances for 4-6 weeks after wedding:
  • Make last payment for the reception.
  • Make last payment for photographer.
  • Pay for photo development.
  • Buy postage for Thank You cards.
  • Lawyer fees for a will and/or prenuptial agreement. 
  • Fees may be needed for changing your name.

Friday, January 13, 2012

What can you do with a T-shirt?

The most useful item in a secondhand shop is a simple T-shirt. There are so many options and I am sure that this post doesn't even do it justice! This is actually my list of items that I want to make with T-shirts so stay tuned to the blog.

Here are some of the things that I can think of on how you can reuse a T-shirt:

As T-shirts:
  • Yoke-neck T-shirt: try this idea that details how to fix a crewneck.
  • Ruffled girly T-shirt: Cut part of the neckline away on an old T-shirt along with the sleeves. Take it in so that it is fitted then sew the sleeves back on in gathers. Do a ruffle with the leftover cut part from the neck back on. This is what I did with this T-shirt.
  • Remodeled men's T-shirt: this version has a ruffle, buttons and nice billowy sleeves.
  • Tucked neck: cut the crew-neck collar off then do a series of tucks around the neck (inspired by this T-shirt from calpatch on Craft Stylish).
  • Victorian ruffled T-shirt: first, fit it on the sides and the bottom to your figure. Save all of the extra fabric. Cut the crewneck off and sew the neck down to a more comfortable place, pin and sew down. Then add the extra fabric to make a ruffle down the front centre of the shirt like a Victorian top. Leave space in the middle and sew the ruffle to the shirt. Add buttons down the middle.
  • Smocking: add smocking! Anywhere! try the shoulder seams, under the bust, around the sleeves or all three options! I love smocking, it looks so cool.
  • Gathers: like tucks, you can get a large T-shirt and fit it by creating gathers on the sides, or perhaps just one side to create an interesting look. 
  • Dolman sleeved wonder: use two T-shirts to make a dolman-sleeved shirt. Stay tuned, I plan on trying this.
  • Baby doll T-shirt: take a really big men’s shirt and cut at bust line, fix sides and shoulders then sew arms back on and gather the shoulders. Then, leave bottom as one large connected piece and sew on with gathers so that it flares all the way around. 
  • Crocheted details: after adjusting a t-shirt, add crocheted details like a crochet neck, sleeves or hems. 
  • Piped details: add piping in contrasting colors around neck, arms and bottom of fitted shirts. Piping can be made from other t-shirts that are solid colours, or printed T-shirts.
  • Lace: take a T-shirt and cut off the sleeves, and cut it in half for a front and a back. Buy a sheet of lace in the same colour and cut to fit either the front or back. Then, sew to the shirt (either front or back), and reassemble the shirt. Take it in to fit on the sides, shoulders and sleeves. Fix the neck perhaps with some satin ribbon in the same colour around the edge.
  • Tank or racerback T-shirt: turn a men's T-shirt into a racerback tank top or a tank top. Perhaps even add details like a lace panel on the back or the front. 
  • Elastic: try adding an effect by sewing elastic underneath the seams on the neck (like this t-shirt) or on the sides (like this t-shirt)
  • Screen printing: try using fabric paint and a stencil or spray paint to create your own logos. Here is an idea on how to do it.
  • Beading: adjust the T-shirt to fit then add beads along the neckline, sleeves or anywhere else.
Other clothing items:
  • Underwear: have you ever tried to make underwear from t-shirts? Here is a tutorial from calpatch.
  • Jersey skirt: what about cutting the neck off and using the arms as pockets on a T-shirt skirt?
  • Cardigan: a t-shirt can be cut up the middle and turned into a ruffly cardigan from this tutorial or a button-up one from this one.
  • Dress: turn two T-shirts into a dress. They could be the same colour or different and the connection between the two can vary from the waist or an empire waist. It can be fitted or not. Ruffles can be added along with other embellishments as well as darts.
  • Hairband: Use leftover scraps to make a hairband. This can be flat, embellished with beads, or braided. Along with many other ideas.
As home items:
  • Cleaning rags: these make fabulous rags for dusting and polishing any surfaces and also for washing the car.
  • Cloth garbage bags: I am going to attempt these with leftover white men's T-shirts. I will post the results. I only plan on doing these for the smaller garbage bins around the house, not the one for the kitchen.
  • T-shirt quilt: if you can't part with them but they are taking up space, make a T-shirt quilt.
  • Lunch bag: try making a lunch bag (perhaps like this one) out of an old T-shirt.
For ideas on what you can do with other clothes in your wardrobe or from a secondhand store, see my post on what you can do with secondhand clothing. This is everything else but T-shirts.

Sunday, December 25, 2011

Soft Boucle Cowl

What a better way to spend winter than with a comfy, warm cowl like this one. I made it extra large so that it can wrap around the neck twice.

Yarn: 2 balls Bernat Soft Boucle Yarn in Teal Twist
Needle: Size 8 (5.0 mm) 16-inch circular


Pattern:
Cast on 36 stitches. Knit for 50 inches. Bind off loosely. Take some scrap boucle yarn and sew up the two seams then weave in all ends.

Notes:
  • I used 1 1/2 balls of this yarn, about 315-320 yards or so.
  • Don't pull on the boucle yarn because it will fray, unravel and break! 
  • I found that the boucle yarn got knotted easily (in the ball). When I pulled the yarn out of the ball, sometimes it was knotted up which drove me crazy. I guess that is called a yarn barf. I had to cut it, fix the knots and weave it back in again.
  • I also found it difficult to thread the boucle yarn into a large knitting needle for sewing the cowl together.
  • I am sure that a pattern for a cowl like this already exists so I am not posting this on Ravelry. If one does exist, I did not copy it. I thought of this on my own and that is a coincidence.

Friday, December 23, 2011

9 Christmas gifts you don't have to buy

Well, it's that time again. It's time to go shopping for presents for our loved ones. We stand in long line-ups then race home to wrap it all. It's very stressful as we hope that the recipient will like what we bought them.

I'm not denying that I do this but I have been undergoing a transformation as of late: what about giving presents that you didn't buy? You may think that I am crazy but sometimes the best presents are ones that don't come from the store. What do I mean? Well, here are some ideas that might spark your imagination.
  1. Jewelry: an item that was worn by a relative or important family member means more than buying the latest rock. I still get tears in my eyes every time I think of my necklace - it came from my great-aunt. I never take it off. Nothing that was bought can replace that connection.
  2. Used hobby items: last year for Christmas I got my great-aunt's old knitting needles and it was the best present ever. Of course, I could buy an entire set into a craft store but she actually used these over the past 50 years. Now I am using them. All my mom had to do was fish them out of the closet! Other great items are pinking shears, scissors, pins, crochet hooks, yarn, fabric, books, patterns and such. If they are sitting around and you know someone who is interested in these items, gift them!
  3. Dishes: for our wedding, we received a butter dish from an older lady who had originally received it for her wedding 54 years ago. This became a treasure in my house. Dishes last for such a long time and can be passed down in the family -- especially if they come with a special story.
  4. Photos: old family photos are a real treasure. Sometimes everyone wants a copy of each photo, so why not go and get copies made of the old family photos and give those in a nice photo album?
  5. Recipe cards: look for the old recipe cards that your grandmother or other family member wrote on. To make this present extra special, include the card (or a really good scan of the card) along with the item itself, made from the recipe. For example, grandma's fruitcake recipe with a fruitcake that you made.
  6. Ornaments: just like dishes, some ornaments are treasures that were given to you by someone special. This is a great idea for whenever a grandparent passes away to give your children an ornament that they gave you one year. Perhaps include a few pictures of the grandparent and you with the ornament.
  7. Furniture: if you have an item that was passed down in the family or bought from an antique furniture store, why not give that? It could be grandma's dresser or end table that will make someone else's day.
  8. Articles of clothing: vintage clothing is very popular right now and you may have some items that you inherited or that you bought a long time ago but don't wear anymore. Some great ideas are purses and accessories but also shirts, dresses and such. I know that even if I don't like the item, I can remodel it and it is still something that my mother wore.
  9. Blankets or quilts: family quilts are heirlooms. So are blankets, especially ones made by a grandparents.

Monday, December 19, 2011

10 (mostly) paperless ways to wrap presents

Christmas is so exciting but usually after all of the presents are opened, this is the scene:


Eco-guilt sets in. Especially in some parts of the world where this paper is sent to the dump instead of recycling. Well, what else can we use? Here are 10 mostly paperless (and re-usable) ideas for wrapping presents that can work for almost any holiday (not just Christmas):
  1. Old paint cans: Clean them out well and take the label off. If you need to remove any sticky goo then you can get a product to do that. Get two cans of spray paint: one a primer and the other in a color of your choice. Then, spray the paint can first with the primer, allow it to dry, then paint it with the second color. After drying, find a present and some embellishments!
  2. The wrapped box: instead of ripping the wrapping paper off of a box, pick some that have lids like shoeboxes and wrap the box. Wrap each part (the box and the lid, or just the lid) separately so that you can reuse it every year. Tie it shut with ribbon, twine or yarn and add a tag and embellishments.
  3. The colorful box: you can buy boxes in almost any store (Zellars, Walmart, Dollarama) that have a decorated lid and a bottom. So, instead of wrapping it like the above option it is already done for you.
  4. The paper bag: try this tutorial that I did for painting a paper bag.
  5. Fabric bags: try this tutorial that I did for making reusable fabric bags.
  6. Felt gift bags: try this tutorial that I did for making felt gift bags.
  7. Mittens, scarves, hats, etc: wind a scarf around a box and tie it with ribbon or stuff a mitten and carefully fold it over. This way, the present (and the wrappings) are one and the same!
  8. Dishcloths, dishtowels, etc: In addition to mittens and scarves, try wrapping the smaller presents in dishcloths and tie shut with twine, ribbon or yarn. You could also use towels, shower curtains, tablecloths or bolts of fabric for the larger presents.
  9. Storage boxes or cubes: try buying a set of these (that are part of the gift), add the gift, close and wrap a ribbon around it. If you are gifting a cube, basket or such then cover the top with fabric to hide the gift then add the tag and an embellishment.
  10. Reused materials: every Christmas, save the gift bags and wrapping paper so that the next Christmas, you can reuse them. We do this at home and these materials are used to wrap presents (mostly stocking stuffers) for the family.

Friday, November 4, 2011

New Sewing Terminology

Well, I just realized that I may be throwing some terms around that may not make much sense or I am using them in ways for which they were not intended. Perhaps a little terminology will help.

Refashion: this term usually refers to clothes that are taken apart and sewed back together into a new piece of clothing. The look of the item has completely changed or has been updated. A good example, is my skirt made out of a bridesmaid's dress.

Remake: this term means taking something that was made for one purpose and reusing it for another. This term can be interchanged with upcycling although it is used more for clothing. This could mean taking a men's t-shirt and turning it into a pair of underwear.

Restyle: this term means taking an item that was created in one style, and giving it a new one. This could man taking a men's t-shirt and turning it into a girly top or giving a skirt a lace hem. As I understand it, this isn't as drastic as upcycling or refashioning.

Upcycle: this term means taking something that was meant for one purpose and reusing it to give it a new life. This term usually refers to an upgrade or better function that the original item had. This could mean taking a pair of pants and turning them into a skirt, or a shower curtain and turning it into an ottoman cover (part 1 and part 2).

Of course, to make things more confusing, some of these terms are interchangeable.


Sunday, October 30, 2011

What to pack for your trip to Paris

Are you planning a trip to Paris? Surely, you are wondering what to pack as well then. Here are some of the items that I packed and what I wished that I had packed. Hopefully I have covered everything that you will need in one suitcase (yes, ONE).

Carry-on:
  • a few really good magazines
  • your iPod, fully charged with new songs, podcasts, apps or TV shows that you haven't seen yet
  • your charger cord for your iPod
  • An adapter for European outlets
  • Lip gloss or chapstick (less than 100g)
  • A lined pad of paper and a pen: to record thoughts, events, your agenda, etc.
  • Your sunglasses: despite the time of year that you are traveling
  • Your laptop: there is a huge debate about if you should bring your computer or not. I did not but I seriously wish that I had. That doesn't mean that I would have spent hours on end on the computer, but I could have uploaded my photos every day and used the wireless internet on my computer with my keyboard (the computer in our apartment had a French keyboard which drove both of us insane).
  • A Paris guide book
  • Your money
  • Your Museum Pass, any tickets to events that you printed out beforehand (Eiffel Tower, Seine Cruises, etc.)
  • Any medication that you must take while you are traveling in a plane
  • Any jewelry that you have brought with you for the trip
Suitcase:

Clothes:
  • 5 shirts (all of them that match your pants, coat and shoes) fitting the seasonal weather
  • 3 pairs of pants (all of them that match your shirts)
  • 2 sets of pajamas
  • 5 pairs of clean socks
  • 6 sets of clean underwear
  • 1 jacket or coat that matches everything and fits the seasonal weather
  • 1 really great scarf that matches everything
  • 2 pairs of shoes (one that you are wearing, one you have packed) and both are good for walking for 8 hours on end.
Items not to bring:
  • Pumps or boots with a heel: seriously, walk in it for 8 hours then see if you can do that for 10 days.Then don't pack them.
  • Your purse, wallet and almost anything from it: this is not the place to carry around a purse. Keep what you need in the pocket of your coat or carry around one small back that has your RER pass, Museum pass, keys and a little bit of money in it.
Toiletries:
  • a double duty shampoo/body wash
  • a bath puff or face cloth (if you use one)
  • toothbrush and toothpaste
  • floss
  • your make-up (just the basics that you use every day)
  • face wash and moisturizer (if you use this)
  • deodorant
  • a small supply of tylenol (just in case)
  • Any medication that you take daily or use often enough that you have to take it with you
  • a nail clipper
  • 1 bottle of Melatonin (to help with jet lag)
Items not to bring:
  • your body lotion unless it is in a smaller bottle and will fit in your toiletry organizer
  • nail polish, nail polish remover
Other items in your suitcase:
  • 2 reusable grocery bags for shopping. Carry these with you as you travel around the city and use them instead of plastic bags as you cannot recycle in the city centre.
  • One knitting project -- or any other craft that you do. Bring one small project and do it in the evenings while you are resting after a long day. Just an hour here and there. You'll be very happy that you brought it.
Notes:
  • Try to keep the weight of your suitcase under 30 lbs (if you can) as your limit will most likely be 50 lbs. You will need that extra space and weight for the items that you are going to bring back: wine, cheese, books, souvenirs, etc.

Wednesday, October 12, 2011

The Bride's Kit

Here's one for you brides: what should you carry around with you in your purse on your wedding day? You know, the one that you will have someone carry around on your wedding day with all of the emergency items? Here is what I had (and some of the items that I wish that I had on that day):

In the main pocket:
  1. A stain remover pen. Just be careful, some have added dyes or could dye the wedding dress.
  2. Tylenol or Advil, whatever you use for headaches or pain management.
  3. A copy of the ceremony program.
  4. A list of phone numbers: the church, photographer, transportation, florist and/or decorator, reception location, hotel, etc. Everyone involved in the wedding.
  5. Also, a map with directions to and from each wedding venue. If you don't use it, your driver might.
  6. A cell phone.
  7. A bottle of water with a tight-fitting cap. No leaks today!
  8. A snack like trail mix.
  9. Cash for any payments that have to be done on this day or for emergency items, like food or water that needs to be bought on site.
  10. A camera with a charged battery and empty SD card to take pictures during the day. You might not take these pictures, but others can use it.
  11. Any medication that you or your groom takes regularly. Although, this doesn't mean bring your vitamins with you.
  12. A small lint roller (if not for you, for the groom).
  13. A travel-sized package of kleenexes or homemade handkerchiefs.
  14. Cough drops.
In a small pencil case, in the purse:
  1. Long-lasting lipstick. Preferably, the one that you will be wearing on this day.
  2. Waterproof mascara.
  3. Concealor.
  4. Eyeliner, if you are wearing any.
  5. Chapstick or lip gloss.
  6. Safety pins.
  7. Bobby pins.
  8. A small can of strong hairspray.
  9. A comb.
  10. Spare earrings that match your dress.
  11. Polysporin.
  12. A bug bite treating stick.
  13. A nail clipper.
  14. A tweezer.
Optional items:
  1. A travel-sized container of hand lotion.
  2. A travel-sized spritzer of scented body spray.
  3. A travel-sized spritzer of glasses cleaner and a cloth - if you wear glasses, this might be a necessity.
  4. Depending on the season of your wedding, you may need allergy pills. If you are highly allergic to certain things, then bring an epi-pen.
  5. If you are very particular about your nails, bring your nail polish with you to fix any chips. I didn't care but some girls do. Just make sure that it doesn't spill or get on your dress when you reapply.

Tuesday, October 11, 2011

Using up leftover yarn

After all of those knitting projects, what do you do with the leftover yarn? I have been pondering this question for some time as I don't want to have small bits of yarn taking up space. So, I researched all of the possible ways that I could use up this yarn to get it out of the way.

The first place to look though is one of the One-Skein Wonders books.There are also some fabulous ideas on Ravelry and Knitting Pattern Central.

15 Projects (knit or crochet):
  1. Reusable makeup remover pads or crocheted face pads. 
  2. Dish scrubbers (or this one) or crocheted tawashis.
  3. Dishcloths. Seriously, just visit this website and try them all. 
  4. Bath puff.
  5. Glasses case. Do a rib around the top to keep it closed.
  6. Pencil case. Sew on a zipper or make buttonholes to close it.
  7. Adult or child headband or ear warmer.
  8. Ipod, phone or Blackberry sock.
  9. Try knitted or crochet jewellery. 
  10. Use it to test stitch swatches or gauge.
  11. Make a sachet for smaller items.
  12. Make shapes like hearts, flowers or squares. 
  13. A coffee cup sleeve or mug sleeve.
  14. Strips for a leftover blanket. Knit long strips for a blanket in all of the leftover yarn then use a matching colour to piece it together.
  15. Belt for kids or adults! 


10 Other ideas:
  1. If you have wool, try felted wool balls.
  2. Use it as scrap yarn to hold stitches.
  3. Use it as scrap yarn to sew up projects where the seam will not be visible.
  4. Use it to embroider a small design (heart, flower, basketball, initials, etc.) on clothing or accessories, for example, a shoe on a fabric shoe bag. Or, to embroider the edges of pillowcases or other household items in a straight stitch to add a little bit of detail.
  5. Use it to do a blanket stitch on the edges of a fleece blanket.
  6. Use it as ribbon to wrap up Xmas presents.
  7. Use it to create a crocheted neckline on a shirt.
  8. Wrap the yarn around wooden or styrofoam letters to spell words on the wall like this project on homemade by Jill.  
  9. Yarn wigs for dolls, kids or adults.
  10. Pom poms. What about a pom pom garland?

Friday, September 23, 2011

Glow in the Dark Yarn

I have a few skeins of the Bernat Glow in the Dark Yarn but I don't know what to do with them!


Here are some of the ideas that I have floating around:
  • Baby beanie hat with a garter stitch border
  • Coffee sleeve
  • Glasses case
  • Belt for kids
  • Mittens for kids
Any comments? Ideas?

Monday, September 5, 2011

Wristlets made from sweater sleeves

After updating my sweater, I had some leftover sleeves, a sewing machine and itchy fingers. I began to wonder what to do with these sleeves as I didn't want to throw them out. Then I remembered how my arms get cold in the winter whenever I wear short sleeves and I got a brainwave - wristlets. I saw a pattern on ravelry for wristlets that I wanted to knit but this was a great idea of how to reuse fabric.

For those of you who don't know, wristlets are like arm warmers but only go from the wrist to the elbow.

For this project, you will need matching thread, a dressmaker's pen, a sewing machine and pins.

I started with these sleeves, which were actually too big:


So, I pulled at the fabric to see what would be a better fit and marked it with a dressmaker's pen. In this case, it was about an inch too big at the seam. So, I followed the line of the sweater and cut off the excess for both sleeves.


On the wrong side (in this case, the side without cables), I pinned the cut seam of the wristlets with minimal seam allowance. I sewed the seam down with a zigzag stitch. I did the same for the second sleeve.

The last part is easy. I took each cut edge and did a zigzag stitch all the way around. This resulted in these frilly wristlets:


And these look VERY cool under my jacket:


Estimated time for this project: 20-30 minutes. I seriously zipped these up in no time.

Notes:
  • I didn't originally intend for these to be frilly but that was a result of the zigzag stitch on the knit fabric. But, I guess we all learn things like this as we go along.