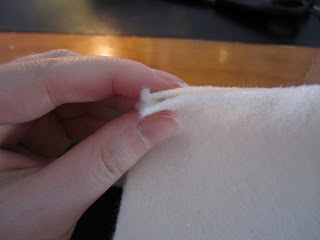
For this project, I used 2 8x10 inch sheets of felt, scissors, pins, matching thread and a sewing machine. A seam ripper is also useful.
To start, I folded the first sheet of felt over and matched up the edges. I cut the felt on the fold.
These are the two face pieces. Next, with the second piece of felt I folded an edge lengthwise, about half way of the sheet of felt. I cut up the middle first then on the fold.
Now I am left with five pieces of felt: two fronts, two sides and a leftover piece which will be the bottom.
The bottom is tricky. There are no precise measurements. I took the leftover piece and lined up a front and a side piece to get an approximate measurement. I don't want for it to be too small or too big.
So, I laid a side piece on top of this leftover fabric and cut on the right-hand side for an approximate width measurement. I cut slightly larger than the side piece.
I also used a front piece to get a length measurement. I used the length of the front piece to gauge where to turn left and cut out my bottom piece.
Sewing
When sewing, it is done in this pattern: side 1, front 1, side 2, front 2. The bottom is the last thing to be sewn together.
I pinned side 1 to front 1 on the outside (this will not be turned inside out: I want the seam on the outside).
I sewed these two pieces together with about 2 milimetres of seam allowance (yes, it isn't much).
I now pinned side 2 to front 1 and sewed that together.
Here it is sewn together as front 1, side 1, front 2, side 2.
I pinned side 2 and front 1 together to form a "box".
Now for the fun part: the bottom. I started by matching the bottom piece up to one of the corners of the front/side pieces and I started to pin with about the same amount of seam allowance. This takes awhile and I was often pricked like a pin cushion while doing it.
I folded one of the sides down for the sewing and sewed the bottom piece on all of the way around.
Now it is done! I will do another post on how to fasten the bag as I haven't finished that part yet.
Estimated time for this project: about 30-45 minutes. It takes about 10 minutes to do the measuring (with a little more on figuring out that bottom piece). Another 10 minutes is spent on sewing the four side and front pieces together. The bottom is tricky and more time consuming.
Notes:
- You could, of course, take measurements and make pattern pieces for a felt gift bag and use those instead of my primitive measurement method (notably on the bottom). Note to self: make pattern pieces.
- I made my felt gift bags in brown, red and cream to match my Christmas colors.
- If you have cream bags, you may have to use tissue paper or fabric to wrap the gift inside a little bit as it is a little bit see-through.
Ideas:
- Why not make felt gift bags in your Christmas colors and reuse them every year for the holidays?
- You could probably stencil some finished felt gift bags with fabric paint, like my burlap garland and burlap Christmas tree skirt.


No comments:
Post a Comment