Showing posts with label upcycle. Show all posts

Thursday, February 23, 2012

T-shirt tote bags

This project is inspired from one that I found on the web on how to create a tote bag out of kids' outgrown t-shirts. So, I took 4 of my nephews' old t-shirts that were about to go to the Salvation Army and I whipped this easy project together in one night. Now they can use these tote bags to carry books, lunches, toys or anything else!

You can find the tutorial on how to do these here.

Here are some pics of mine! I sewed the cut edges down which was not done in the tutorial but otherwise it's the same.


Saturday, February 11, 2012

How to dye fabric

Do you have an item that you like but you hate the colour? Why not dye it?

For most of this project, you need to follow the manufacturers directions. I used one package of black fabric dye, a large bucket, hot boiling water and a large Dutch oven pot, a wooden spoon, a ratty old dishtowel, rubber gloves, 2 dark or ratty towels, an iron and an apron.


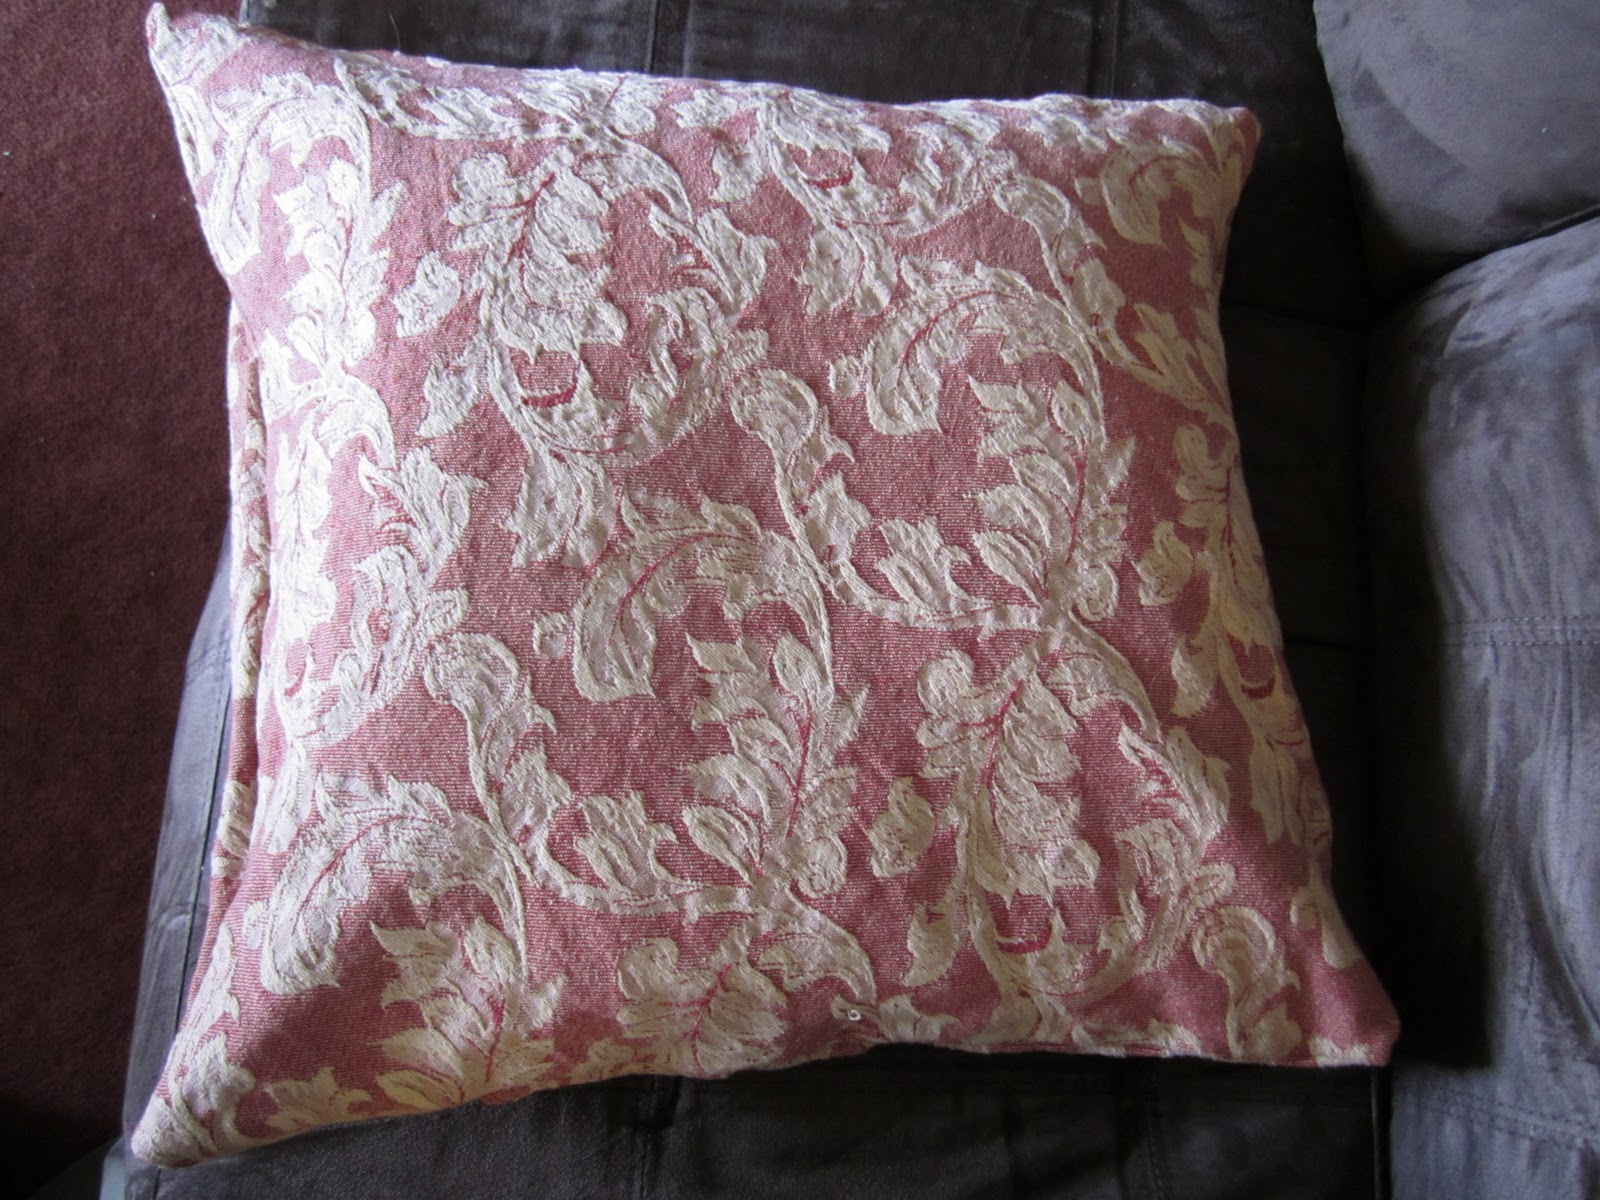
This is one of the two pillowcases that have serious bleach damage so I decided to dye them - the project for the dyed fabric is coming.


I set everything up by the kitchen sink and put the fabric in the plastic bucket. i put on an apron to protect my clothes then I boiled a full large pot of water on the stove. Once it started boiling, I poured the water into the bucket with the fabric.


I added the dye packet to the hot water and stirred vigorously as the instructions said. So, I turned on the music and stirred for half an hour as best as I could. As you can see, it turned my wooden spoon black!


After 30 minutes, I dumped the water out and started rinsing the fabric under cold water. At this point, I put on the rubber gloves so that I didn't dye my hands. I started first by dunking it into a filled bucket of water then ran the fabric under running water until it ran clear. Then I set up two dark towels in the bathroom so that I could allow the fabric to drip dry -- without accidentally dying my towels or my tile floor. I then used the ratty dishcloth to clean up the sink in the kitchen as there were dye spots everywhere.


Once it was dry, which happened overnight, I ironed it to set the color in the fabric. Done! Now the fabric is ready for my next project.


Estimated time for this project: 8-10 hours (including drying time). The actual hands-on time is something like 45 minutes.

Notes:
  • This turned the tan-coloured fabric a lovely slate grey. It wasn't completely black but I didn't expect that. And, the bleach stains were gone. 

Ideas:
  • If you have a pair of jeans that faded over too many washes, why not dye them indigo again? There is jean dye out there. 
  • I read in a craft book one time that you can dye patterned fabric. It won't be a uniform result but it's an idea!

Saturday, January 28, 2012

How to cover a scrapbook with T-shirts

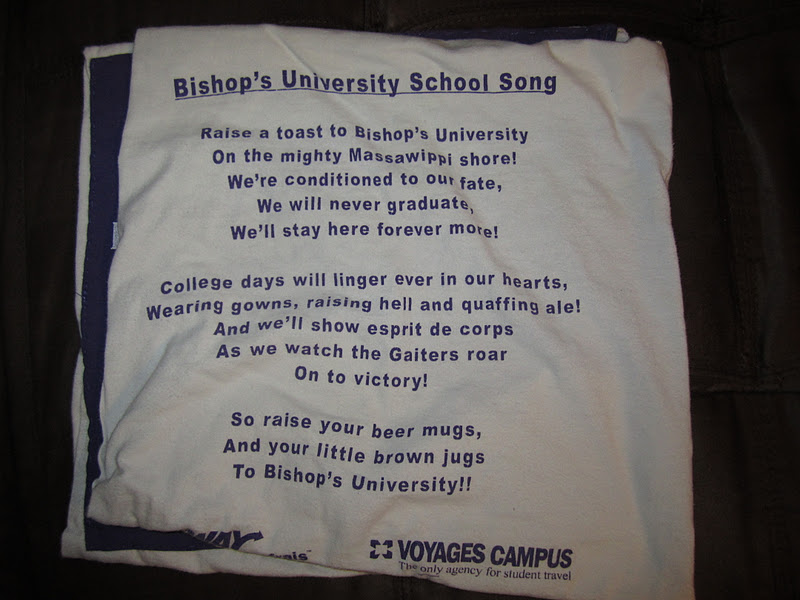
This is my university scrapbook. I got this kit for Christmas one year and I wasn't going to let it sit there because I didn't like the cover. I kind of decided a long time ago that I was going to cover it with something then I realized that I still had two of my old t-shirts from university.

 (before)


 (after)

Then I got this idea: use the T-shirts to cover the scrapbook. Brilliant! You'll have to pardon the lack of tutorial photos though as I did this project before I started this blog.

For this project, I used two old T-shirts, matching thread (in this case, purple and white), a sewing machine, scissors, and the scrapbook that needs to be covered. A measuring tape and white or blue dressmakers pencil also came in very handy.

Cutting:

As I mentioned, please pardon the lack of photos for this part. What I did was measure the height and width of the scrapbook then put those measurements on the front and back of each T-shirt, marking the edges with the dressmaker's pencil. Then, I cut out 4 squares with at least 1 cm seam allowance on all sides.

Sewing:

As there was screen printing on the front and back of both T-shirts, I decided to have the white shirt on the outside cover and the purple shirt on the inside cover. I wanted to keep the print facing out. 

I pieced together the two white pieces for the outside cover and pinned them together on the wrong side where the seam for the spine would be and sewed them up on the sewing machine.


Next, I took the two pieces of the purple shirt (which will be the inside) and I pieced it onto the white shirt to see where the seams would be. I then pinned the seam facing the inside spine and sewed it down with matching thread on the sewing machine. For one piece this was the far right side, for the other one it was the far left.


Then came the easy part. I turned both the white and purple shirt pieces inside out and pinned the front cover pieces on the wrong side up the seam with 1 cm seam allowance. I sewed this up on the sewing machine then did the same with the other two pieces. I now had a white outer cover and purple inner cover.


Again, I apologize for the lack of photos for this tutorial but I do have another scrapbook to cover and I will take pictures of that one.

Estimated time for this project: about 1 hour.

Notes:
  • This is really easy when you use measurements of the scrapbook that needs to be covered. 
  • If you want to serge any edges that is fine too, notably the edges of the white shirt around the spine. 
  • This cover is washable as the T-shirts were washable. 
Ideas:
  • The possibilities for this are endless. Use your kids' old t-shirts to cover a small scrapbook for them, use your favorite t-shirts from high school to cover a high school scrapbook, etc. If you get t-shirts from a conference or camping trip that you want to remember, use them to cover the scrapbook. 
  • You could even take a white t-shirt, paint it or stencil it then use it to cover a scrapbook. 
  • You can dye fabric and use it to cover a scrapbook.

Friday, January 13, 2012

What can you do with a T-shirt?

The most useful item in a secondhand shop is a simple T-shirt. There are so many options and I am sure that this post doesn't even do it justice! This is actually my list of items that I want to make with T-shirts so stay tuned to the blog.

Here are some of the things that I can think of on how you can reuse a T-shirt:

As T-shirts:
  • Yoke-neck T-shirt: try this idea that details how to fix a crewneck.
  • Ruffled girly T-shirt: Cut part of the neckline away on an old T-shirt along with the sleeves. Take it in so that it is fitted then sew the sleeves back on in gathers. Do a ruffle with the leftover cut part from the neck back on. This is what I did with this T-shirt.
  • Remodeled men's T-shirt: this version has a ruffle, buttons and nice billowy sleeves.
  • Tucked neck: cut the crew-neck collar off then do a series of tucks around the neck (inspired by this T-shirt from calpatch on Craft Stylish).
  • Victorian ruffled T-shirt: first, fit it on the sides and the bottom to your figure. Save all of the extra fabric. Cut the crewneck off and sew the neck down to a more comfortable place, pin and sew down. Then add the extra fabric to make a ruffle down the front centre of the shirt like a Victorian top. Leave space in the middle and sew the ruffle to the shirt. Add buttons down the middle.
  • Smocking: add smocking! Anywhere! try the shoulder seams, under the bust, around the sleeves or all three options! I love smocking, it looks so cool.
  • Gathers: like tucks, you can get a large T-shirt and fit it by creating gathers on the sides, or perhaps just one side to create an interesting look. 
  • Dolman sleeved wonder: use two T-shirts to make a dolman-sleeved shirt. Stay tuned, I plan on trying this.
  • Baby doll T-shirt: take a really big men’s shirt and cut at bust line, fix sides and shoulders then sew arms back on and gather the shoulders. Then, leave bottom as one large connected piece and sew on with gathers so that it flares all the way around. 
  • Crocheted details: after adjusting a t-shirt, add crocheted details like a crochet neck, sleeves or hems. 
  • Piped details: add piping in contrasting colors around neck, arms and bottom of fitted shirts. Piping can be made from other t-shirts that are solid colours, or printed T-shirts.
  • Lace: take a T-shirt and cut off the sleeves, and cut it in half for a front and a back. Buy a sheet of lace in the same colour and cut to fit either the front or back. Then, sew to the shirt (either front or back), and reassemble the shirt. Take it in to fit on the sides, shoulders and sleeves. Fix the neck perhaps with some satin ribbon in the same colour around the edge.
  • Tank or racerback T-shirt: turn a men's T-shirt into a racerback tank top or a tank top. Perhaps even add details like a lace panel on the back or the front. 
  • Elastic: try adding an effect by sewing elastic underneath the seams on the neck (like this t-shirt) or on the sides (like this t-shirt)
  • Screen printing: try using fabric paint and a stencil or spray paint to create your own logos. Here is an idea on how to do it.
  • Beading: adjust the T-shirt to fit then add beads along the neckline, sleeves or anywhere else.
Other clothing items:
  • Underwear: have you ever tried to make underwear from t-shirts? Here is a tutorial from calpatch.
  • Jersey skirt: what about cutting the neck off and using the arms as pockets on a T-shirt skirt?
  • Cardigan: a t-shirt can be cut up the middle and turned into a ruffly cardigan from this tutorial or a button-up one from this one.
  • Dress: turn two T-shirts into a dress. They could be the same colour or different and the connection between the two can vary from the waist or an empire waist. It can be fitted or not. Ruffles can be added along with other embellishments as well as darts.
  • Hairband: Use leftover scraps to make a hairband. This can be flat, embellished with beads, or braided. Along with many other ideas.
As home items:
  • Cleaning rags: these make fabulous rags for dusting and polishing any surfaces and also for washing the car.
  • Cloth garbage bags: I am going to attempt these with leftover white men's T-shirts. I will post the results. I only plan on doing these for the smaller garbage bins around the house, not the one for the kitchen.
  • T-shirt quilt: if you can't part with them but they are taking up space, make a T-shirt quilt.
  • Lunch bag: try making a lunch bag (perhaps like this one) out of an old T-shirt.
For ideas on what you can do with other clothes in your wardrobe or from a secondhand store, see my post on what you can do with secondhand clothing. This is everything else but T-shirts.

What you can do with secondhand clothing

If you shop for secondhand clothing then you should read this list. This isn't just what to look for but what you can do with it. You might pick up something that you really like but it doesn't fit or has a stain. Do you still buy it? Read on to see all of my ideas on what you can do with it, even if you can't wear it. 

Common concerns:
  • Stains: look for stains and if they will be easy to remove or difficult. If you pick up a shirt that is stained but you really want it, you can also consider adding a cloth flower or some other detail on the stained area to cover it up (if that is possible). You could also try this trick with bleach that the homemade mamas did. Otherwise, this could be a dealbreaker.
  • Care instructions: make sure that it is machine washable. Look for tags that indicate the care instructions and consider carefully those items that are "Dry Clean Only" or "Handwash" and if you will follow those instructions. 
  • Smell: items can be washed or dry cleaned to get rid of the smell of secondhand clothing. If you have an item that has very specialized care instructions (such as leather or suede), you might want to reconsider.
  • Fit: refer below for lots of ideas about fit. Generally, items have to fit you in the right places such as the bust or chest, shoulders, hips and thighs. After that, everything else can be adjusted. Whatever you buy, you have to be able to button or zipper it up properly. Also look to see where things fit you -- something can look fantastic on the rack but if you are short-waisted (like myself), it may look terrible on you once you put it on. Some fit issues cannot be changed such as the width of a leg.
  • Colour: depending on the fabric and the colour (or print), almost anything can be dyed. Jeans can be dyed a darker colour or lightened with bleach. So, if you pick something up that has great bones and seams but a horrible colour, consider dying it. You may have to change the buttons though (if there are any).
What to look for:

  • Coats: look for both summer and winter coats in neutral colors and in some flashy ones to go with my outfits. Look for good seams, pockets in the right place, single-breasted coats. Wool or cotton are ideal fabrics. Fuzz and nubs can always be removed with a clothes shaver. If you don't want to do too much adjusting to a coat (sleeves, length, fit, etc) then get one that fits from the beginning.
  • Blazers / jackets: it’s alright if they are too big, no problem. Just make sure that they fit at the top and aren't too short. The fabric can’t be too faded and it has to have good seams. You can change the lining (if you want to go that far) and you'd have to remove it anyway to make any fit adjustments. You can change buttons and pocket linings -- or pockets can be sewn shut or removed. You can add different collars too (like a fake fur one).
  • Button-up shirts: fit can always be adjusted as can sleeves and darts but it has to button up properly (or be too big). Men's button-up shirts can be turned into aprons. You can turn almost any button-up top into a tube top or cloth handkerchiefs. You can add piping to the edges of the collar and the cuffs, change cuffs or buttons, and change the sleeves from long-sleeve to short or 3/4 sleeves.
  • Sweaters: look for good, reliable machine washable fabric that won’t warp or fade easily. Good construction, not rotten cotton, and good seams on the inside. The bust and waist have to hit at the right spot. If it is too short though there is still hope: it can still be used to make pillow covers or a fooler top. The neck can be cut off of turtlenecks and it can be turned into a scoop-neck whereas sleeves can be shortened to short sleeve or 3/4 sleeve. It can also be taken in the sides if the fit is too big or baggy.
  • Dresses: they can be fitted on the sides and darts can be added. The length can be adjusted (unless it are too short). Also, they can usually be turned into tops or skirts with minor adjustments. Sleeves can be cut off to create jumpers.
  • Jeans: need something that fits in the legs, hem and hips. If they are too long they can be hemmed and the waist can always be tucked but nothing can be taken out if they are too small. Jeans can be dyed, turned into shorts or skirts or they can be upcycled into sturdy draft snakes for windows or doors or log carriers. They also make great tote bags or garden bags, anything that requires a sturdy fabric. Make sure you have jean needles and strong thread for your sewing machine. 
  • Pants: as long as they fit in the waist, hip and legs then you are fine. Pockets can usually be removed and sewed down if they ruin the look of the pants. If you want to shorten them into capris or shorts then you can, or turn them into a skirt. They can be dyed as well. Pants also make excellent fabric for purses or lunch bags.
  • Long skirts: these can be hemmed into a shorter skirt and then options are endless. You can embellish a hem with ribbon, lace or anything else that comes to mind. Or, you could turn a long skirt into a dolman top. If you have a size 4 skirt that you like but it won't fit you, try my post on turning it into a larger skirt.
  • Skirts: look for some that fit you then you can work with the hemline, the colour and such. You can add things to the hem like lace or ribbon. You can also turn pants into skirts. Take a second look at wrap skirts because you might be able to change the size if there is enough fabric.
  • Jewelery: broaches, necklaces, earrings, etc. All are fair game. Look for the real stuff if you can (real gold, white gold, real stones, etc.). Consider that most jewelery can be cleaned or vice versa, taken apart and reused as raw materials for new jewelery.
  • Belts: look for belts that are not torn, ripped or falling apart. Buckles can be replaced and even the belt itself can be covered in fabric and given a new look. Studs or grommets can be added as well as beads, rhinestones or fake jewels.
  • Shoes: really look carefully at these!! They have to fit in the toes and heels. They can’t be falling apart, cracked or split and the soles have to be good. Soles can be glued or sewn back onto shoes and the inside soles can always be reglued and replaced. They are usually all crumpled in the store but the leather should stretch back into place.
*You may have noticed that I left out t-shirts. This is because that point was so large that I created a whole other post for it. You can find it here.

House items:
  • Pillowcases: if you really like a pillowcase, it can be turned into a number of things. It can be adjusted and worn as a skirt, it can become pillow covers (for smaller throw pillows) or used as cloth handkerchiefs or cleaning cloths.
  • Shower curtains: first, it can be used as is or you could use this fabric for anything from an ottoman cover, to pillow covers, to a blanket (if it is cloth and you like it). Think of using it as a curtain in the bedroom, or making smaller café-style curtains for other types of windows.
  • Towels: it can be used for its original purpose or turned into a rag rug like Sisters of the Wild West did. Towels make excellent trendy pillow covers (if they are not stained or smelly) and can also be turned into a litter rug for a cat's litter box. If you have enough towels in the same color, you could probably use them to slipcover smaller pieces of furniture like an ottoman cover.
  • Sheets: there are endless options for sheets. They can be used as intended and embellished with a ribbon trim. Sheets can also be stenciled along the edges then put on the bed. Or, they can be turned into fabric for clothing. They can be dyed. These can be turned into capes for would-be superheros on Hallowe'en. They can be used as slipcovers for furniture. 
    And here are a few more ideas that can refer to almost anything from this list:
    Other related sources:

    Tuesday, December 20, 2011

    10 frugal ways to decorate for the holidays

    The holidays are approaching and it's time that we deck the halls to celebrate. Sometimes that stuff is expensive or the decorating ideas that we have cannot be realized with the budget. But, no fear! Here are 10 ideas of how to decorate on a tiny budget.
    1. Pine cones: take a trip to the local park or an area that has lots of pine trees with a few garbage bags or boxes and collect the nice pine cones. Really look them over for bugs, mold or any imperfections before bagging them. Bring them home and wash them in a sink of hot water (when I did this, they closed up but reopened as they dried a day later). Then, use them in leftover planters, vases or jars tied with ribbon.
    2. Cookies: make a few batches of sugar cookies and decorate them with icing done in your Christmas colors. Before baking them though, put a hole in the top with a wooden skewer. Do designs like snowmen, reindeer, snowflakes, ornaments, or words. Once the icing is dry, string them up with leftover yarn, ribbon or twine and decorate the tree with them. Or, just display them on nice cake stands on the table.
    3. Food: create nice displays around the house with clementines, apples, or other seasonal fruit and vegetables. Use vases, jars or cake plates and place them carefully. If you really want to get into this, cover the items with powdered sugar or salt to create the glittery effect.
    4. Stockings: make this year's stockings out of old sweaters, t-shirts or button-up shirts. If they aren't the right color, you can buy fabric dye and follow the package instructions to dye the fabric. Sew up with a sewing machine and decorate with ribbon or felt accents.
    5. Centrepieces: take some mixing bowls and fill them with Christmas ball ornaments, pine cones, greenery or other items. Or, pack them with a mix of Christmas ball ornaments, apples and other items. Place in the centre of the table. Also, add bowls or planters of ornaments to end tables, magazine tables and other places around the house.
    6. Wrappings: try some of the tips in my post about green wrappings along with embellishments like yarn pompoms, Christmas ribbon made from old shirts and other festive touches.
    7. Tree: get an artificial tree with lights so that you buy it once and use it for at least 10-15 years. Decorate with ornaments, cookies, gingerbread men, pine cones or (if you want to be really traditional) strings of popcorn or cranberries. You could also decorate with paper snowflakes made out of white paper, dolls, clocks, etc. The options are endless, but start with your favorite colors and a theme.
    8. Table: use a clean white tablecloth and use your best dishes but have little touches here and there like candles, decorated paper tags for guests, napkin rings, etc. The food should speak for itself, you don't have to have the table fully decked to the nines.
    9. Rooms: add a little touch of the holidays to every room like a special cup towel in the kitchen, or towels in the bathroom. As long as everything is clean and organized, it looks fabulous and doesn't cost hardly anything. You could even do this with well-placed Christmas cards that you received.
    10. Outside: depending on your location, try LED lights and topiaries. Or, you could make a wreath out of leftover strips of fabric in your color theme wrapped around a Styrofoam wreath form. You can also put out bowls of ornaments by the entrance.

    Tuesday, November 22, 2011

    Fabric Christmas Gift Bags

    Last year I started making fabric Christmas gift bags instead of wrapping presents in reams of paper every year. I think the eco-guilt finally got to me one Christmas when I saw all of the ripped paper lying around the floor. Here is an insanely simple drawstring bag that you can use for wrapping Christmas gifts. I make them in all sorts of sizes for stocking stuffers or gifts but the basic principle is the same.


    (made for wedding scrapbook gifts)


    (made from leftover pant legs - what can't you do with leftover pant fabric?)


    (made from leftover tablecloth fabric from my pillow covers)

    For this project, I used 1 piece of fabric (size will vary but it should be cut into a large rectangle), scissors, matching thread, matching ribbon (thin, not too wide), a taped safe and a sewing machine.

    First, I cut out the fabric. In this example, I was wrapping a scrapbook so I used it to measure how big of a rectangle I needed.


    I cut out the fabric based on the amount needed to cover the item with a little room on the sides and about 2 inches extra on each side (for the drawstring top). If you aren't good at eyeballing fabric and then cutting a straight line, you could use a measuring tape and dressmaker's pen then cut.


    (Sorry that the picture is so dark, it's November after all)

    After the piece is cut out, it's quite simple. Fold one edge under about 1/2 inch (less or more depending on the type of fabric that you have. You want enough space to run a ribbon through the gap though. Pin this edge down and sew it. I just did a zigzag stitch on mine (sew and stop fraying at the same time = awesome).


    Then, pin down the cut edge and the bottom (which is now the edge that was not rolled under and sewed before. Sew this down then serge (or zigzag) the edges to prevent fraying.  Turn the bag inside out so that the good side is facing and all of the seams are on the inside. Poke the corners out with your finger.


    Using a small knife, cut two holes close to the side seam then pass a ribbon through attached to a taped safety pin. Cut the ribbon and tie both ends to create a knot. Done!


    Estimated time for this project: about 20 minutes for the sewing and 20 for the ribbon. This is seriously fast: cut, zip, zip. Sometimes, I do all of the sewing and then thread the ribbon into a pile of these bags another evening. 

    Notes:
    • Try to make these out of a machine-washable fabric, just in case you wrap something that spills. Almost all of my bags are made out of leftover upholstry fabric. 
    • A serger is excellent for sewing up the edges.
    Ideas:
    • I have tons of these to use for wrapping stocking stuffers and presents. They are all sorts of shapes and sizes. I even have tall long ones for magazines and small ones for gum and cough drops. 
    • I've reused fabric for making these: old dress shirts, pant legs, tablecloths, curtains, etc.
    • I've made my bags in a color scheme that matches my Christmas decor (red, cream, brown). That is totally possible! You could use a red fabric with red ribbon (or yarn).

    Tuesday, November 8, 2011

    Drawstring lunch bag out of leftover pant legs

    Back in August, I blogged about the capris that I created for myself as I had no shorts. Well, I used the leftover pant legs that were cut off the pants to make a drawstring lunch bag for myself. It is very easy to do as it is just a square bag with a drawstring.


    I made this the same way that I made my felt gift bags (so the directions are there) with these small differences:
    • I did a zigzag stitch around all of the inside seams to keep it from fraying.
    • I folded the top under twice to create a seam at the top but with enough space to pass a ribbon through. Once this was sewn down, I cut two holes and passed a ribbon through the same way that I passed the elastic through my remade white skirt. The ribbon acts as a drawstring.
    Estimated time for this project: about one hour. It took some time to measure out the fabric that I needed and to sew up the bottom (same as the felt gift bags). It also takes time to pass the ribbon through the top.

    Notes:
    • This could be made from almost any leftover fabric, I imagine. 
    • If I had made this from new fabric, I'd make it out of oilcloth.
    • To keep the ribbon in the bag, I knotted it at the ends but also close to the holes so that it didn't come out.

    Monday, November 7, 2011

    Shortened pajama pants

    I have a problem: I buy pajama pants and after they go through the dryer a few times they are three inches shorter. This drives me nuts. I also don't have enough money to buy the exercise wardrobe that I want so I got this idea: shorten these pajama pants into capris and use them for working out.


    For this project, I used another pair of capri pajama pants as a "pattern", scissors, pins, matching thread and the sewing machine. 

    I took another pair of pajama pants that I had made into capris and used them as a "pattern". I smoothed both pairs of pants out and matched them up.


    I cut the pajama pants about 1 inch below the line of the capris. 


    Then, I took each pant leg and sewed the cut edge down. I folded it down once and then again like shown in the pictures.


    Then I sewed it down with a straight stitch on both legs. 


    That was it! Done!


    Estimated time for this project: 20 minutes. This is a really quick one, especially if you already have a guide like a pair of capris that fit properly to use as a pattern.

    Idea:
    • With the leftover pant leg fabric from these pajama pants, I made cloth handkerchiefs. I cut them into the appropriate dimensions then did a quick zigzag stitch around all of the edges (a serger works too). 

    Pillow covers

    This is a great project for decorating a room in the house. I used leftover pieces of fabric from various projects to make these covers and I can always wash them or change them whenever I feel like it.


    These are custom pillow covers as they will depend on the size of the pillows that you have laying around. For this project, I used one round tablecloth (about 1.5 yards of cotton jacquard fabric), matching thread for sewing, scissors, measuring tape and a dressmakers pen. Of course, pins and a seam ripper are used when sewing. Velcro is also useful but not necessary.

    Cutting and Measuring

    So, I started by measuring the pillow with the measuring tape to see where the seams ended. This pillow measured 16 by 16 inches so I made a measurement on the wrong side of the fabric for one square that measured 17 by 17 inches (front piece). I marked it with a dressmakers pen and cut it out.

    Next, I measured two more pieces, one for 17 inches wide by 8 inches (back piece 1) and another 17 inches wide by 12 inches (back piece 2). These will become the back of the pillow that overlaps.


    Sewing

    Now it's time to do the sewing. All of this is done on the wrong side. For the two back pieces, I took one of the edges and folded the seam down by 0.5 cm, then another 0.5 cm to cover the raw edges. I pinned the seam and sewed it down. I then did top stitching on the double seam. I did this on the second piece as well.

     
    Now, I took back piece 1 (which is the smaller piece) and sewed it to the front of the pillow with the two right sides facing each other. Next I pinned back piece 2 to the front (again with the two right sides facing each other) and sewed it to the front piece. It overlapped back piece 2 like so:


    Last, I sewed the entire edge of the pillow, now with both back pieces sewn to the front piece, with a zigzag stitch to keep it from fraying. I turned this pillow cover inside out and put a pillow inside. Done!

    Here is another pillow cover that I made from leftover fabric from my canvas fabric tiles:


    Estimated time for this project: 1 hour. It took about 20 minutes to cut this out then another 40 (or so) to do all of the sewing.

    Notes:

    • For the next ones that I make, I think that I will add some velcro to the two back pieces to seal it shut. 
    • These pillow covers bag over a pillow that is smaller than the cover. I find it unsightly so I try to make sure that the pillow fits the cover. 
    • A machine-washable fabric makes these covers delightful if you spill wine all over them. 

    Ideas:
    • I have plans to have pillow covers for the seasons and I can rotate them at will. 
    • I plan on making some pillow covers with stencils on them like my burlap garland and Christmas tree skirt.

    Friday, November 4, 2011

    New Sewing Terminology

    Well, I just realized that I may be throwing some terms around that may not make much sense or I am using them in ways for which they were not intended. Perhaps a little terminology will help.

    Refashion: this term usually refers to clothes that are taken apart and sewed back together into a new piece of clothing. The look of the item has completely changed or has been updated. A good example, is my skirt made out of a bridesmaid's dress.

    Remake: this term means taking something that was made for one purpose and reusing it for another. This term can be interchanged with upcycling although it is used more for clothing. This could mean taking a men's t-shirt and turning it into a pair of underwear.

    Restyle: this term means taking an item that was created in one style, and giving it a new one. This could man taking a men's t-shirt and turning it into a girly top or giving a skirt a lace hem. As I understand it, this isn't as drastic as upcycling or refashioning.

    Upcycle: this term means taking something that was meant for one purpose and reusing it to give it a new life. This term usually refers to an upgrade or better function that the original item had. This could mean taking a pair of pants and turning them into a skirt, or a shower curtain and turning it into an ottoman cover (part 1 and part 2).

    Of course, to make things more confusing, some of these terms are interchangeable.


    Sunday, October 30, 2011

    10 projects that I want to do in 2012

    I love searching for new project ideas and these are some of them that you may see from me within the year. These are 10 projects that have my head spinning with fabric choices and ideas. This will also be a way for me to keep track of these projects for when the time comes:
    1. Fleece argyle blanket: this idea is on CraftStylish and doesn't require any sewing at all. I love anything having to do with argyle. 
    2. Pet sleep sack: I have some fake fur lying around and with leftover fleece from the argyle blanket, I can whip up this sleep sack in no time.
    3. T-shirt into a Tunic: Calpatch is my favorite contributor on CraftStylish and I absolutely love this t-shirt. 
    4. Kitty litter rug: I have an old towel lying around waiting to be upcycled into this litter rug. Felix (my orange/white tabby) doesn't like the litter mat that I bought him into Wal-mart.
    5. Felted ball garland: I have never felted before but I love the idea of making felted balls into a Christmas garland. I like the look of it.
    6. Stenciled wood coasters: I see these wood coasters on Etsy and they inspire me to stencil them and use them around Christmas time or to give them as gifts.
    7. Coffee cup sleeve: I love this coffee cup sleeve and it might have better grip on a coffee cup than a knitted coffee cup sleeve. 
    8. An apron for myself: I made one for my husband (actually, I made him three) but I haven't made one for myself. My husband has a pink dress shirt that is now too big for him so I will be making one soon. 
    9. Remolded crayons: after my post about crayons, I just have to make this at home! I have two nephews who would love this.
    10. Dryer sheet sachets: I don't want to use dryer sheets anymore so I want to make a green project like this one.

    Thursday, October 13, 2011

    10 cheap, homemade present ideas for kids

    I like making my gifts because I think that they mean more to the recipient. Of course, gift cards and toys are always acceptable and I am not saying that everything has to be homemade, but these are the gifts that they will most likely remember and keep.
    1. Scrapbooks: I am making this for my nephews this year and I hope that they will enjoy it for years to come. I also plan to do this with my kids: each one of them can get a scrapbook detailing the past year for Xmas so that when they leave the nest they have these gifts. If you don't have time to make a scrapbook, a photo album always works too.
    2. Re-molded crayons and coloring books: what a great way to use up old crayons! The blog notes that this works best with Crayola or another good name brand of crayons and perhaps not with cheaper Dollarama crayons.  
    3. T-shirt tote bags made from their favorite t-shirt which was stained, too small or wore to rags. This way they can still have happy memories of that shirt for years to come, even if it doesn't fit.
    4. Clothes: whether bought or homemade, they are always welcome, especially if their favorite super hero or cartoon character is featured. You can always take a plain t-shirt and buy some fabric with their favorite super hero or celebrity on it. Cut out an image from the fabric and sew it onto the front of the plain t-shirt for a custom shirt that they will love. This is even better if you make a pair of pajama pants to match.
    5. Room sign: make a sign for the door into their room. I used to do this in camp on a piece of wood that we painted with our names and splattered our favorite shades of paint all over it. I still have it and I remember thinking when I was a kid that it was the coolest thing ever that I could display on my door.
    6. Knitted or crocheted blanket: you can make kids a cozy blanket out of their favorite colors. I made one of my nephew and I made it big enough for him to use until he's in his teens. I did a subtle ribbing pattern on it.
    7. Christmas ornaments: make one every year since your child was born with the date on it so that when they grow up and leave the house, they already have a small collection of ornaments for their own tree. This could be as simple as wooden snowflakes that you have painted white and wrote the name and date with a gold pen on the back. You could use that same gold pen to outline snowflake details on the front too.
    8. Room decorating: all kids like to decorate their room. What about if your Christmas gift to them was a redecoration of their room? That means paint, wallpaper (maybe) and perhaps a few matching items for their room. You could wallpaper the back of the door or the back space of the bookshelves for dramatic effect.
    9. Personal plates: do up their own place setting with a cup, mug, plate and silverware. You can buy these now in craft stores and paint them yourself then fire then in the oven or glaze them. Do a nice design on them so that they look forward to eating everything on their plate to see that design (we wish!).
    10. A candy or cookie bag: make their favorite cookies or homemade candies, bag them up and put them in their stocking for Christmas morning. I can remember fudge, truffles and snickerdoodle cookies being my favorite and we only ate them at Christmas.

    Wednesday, September 28, 2011

    Bridesmaid's dress refashioned into a skirt

    Back in 2008 (when I was 55 pounds heavier) I was a bridesmaid at one of my best friend's weddings. I wore a lovely blue floor-length dress.


    However, after the wedding, I wasn't sure of what to do with the dress as I couldn't wear it again - especially because it no longer fit. So, I decided to turn it into a knee-length skirt. I made this before I was taking pictures of my projects and posting them on this blog so forgive my lack of visual interest for you.

    I won't go into detail about how I made this one but I will be posting it in another project (stay tuned!). Here is the finished product. 


    Notes:
    • If you want to make a skirt out of a bridesmaid's dress, look at the fabric. Mine was satiny so it seemed very delicate when I sewed it. By delicate, I mean that it would run like pantyhose.

    Sunday, September 18, 2011

    Resizing a size 4 skirt

    Now, obviously, I am not a size 4 but I saw this skirt into Frenchies and I had to have it. I had a wild idea: how do you turn a size 4 skirt into a skirt that would fit me?

    Of course, this won't work for every skirt. If it is already knee length then you are out of luck unless you want to wear a mini skirt. This particular skirt was flouncy and came to the ground so I was in luck.

    I don't have a "before" picture, but here is the after:


    What I did is I took a skirt that fit me perfectly and laid it over this skirt. I lined them both up at the bottom hems. At the top, I cut the white skirt where the waist of the other skirt hit me with two inches of seam allowance.

    Next, I folded down the waist to see how much I needed for the elastic. After measuring, I found that I needed 1 cm then 1 inch for the elastic, with some room to move around. 


    I folded the seam for the first seam allowance:


    Then I folded that under and down about 1 inch and a little bit to allow the elastic some room.


    I continued this folding pattern and pinned it down to the skirt.


    Then, I sewed the waistband down close to the edge but not all of the way around. I left about two inches open between where I started and where I ended.


    Now it's time to add the elastic. I used a large safety pin that I hooked into the elastic and closed shut. I learned the hard way to tape this safety pin around the closure before pulling it through the waistband so I recommend that to you on this step.


    I inserted the safety pinned elastic into the opening in the skirt and started to gently pull it through by scrunching the fabric up then pulling it back like a scrunchie.


    Once I had pulled the elastic all the way through, I put the two ends together. I made sure that the elastic was not twisted somewhere so that they lined up perfectly and I cut off any excess.


    I sewed these two cut ends of the elastic together with a straight stitch, which I backstitched a few times. Then I did the zipper stitch over the cut ends (even though they wouldn't show).

    I put the elastic into the waistband then I pinned the hole in the waistband shut and sewed it down.


    And voila, I have this wonderful elasticized skirt that fits me (without being tight). I love it! Hard to believe that it used to be a size 4 skirt.


    Here's a close-up of the elastic waistband:


    Estimated time for this project: 2 hours. Most of this time was used up fitting the elastic waistband and pulling the elastic through. Other than that, it was very easy to do. The bottom and seams are already finished which was a great bonus for me. 

    Notes:

    • This was a very long skirt so it was easy to cut it at a place that fit me better so that it would be a knee-length skirt. 
    • I'm not sure how well this will work with a size 4 skirt that is fitted instead of swingy or flouncy but I will try it. 
    • I was going to add a lining under the skirt in white cotton but I decided not to as I made a slip to go under all of my skirts instead of lining every one of them. But, it is an option. 
    • When I was pulling the elastic through, I had to keep it straight. It had a tendency to stretch and curl so I had to constantly smooth it out. 
    Ideas:
    • I could have done some work on the skirt itself but I didn't. One idea, is to take a bright-colored thread in your color of choice and top stitch down all of the seams and edges for some detail.
    • I could have added other details like embroidery or lace under the edge in a matching or contrasting color.