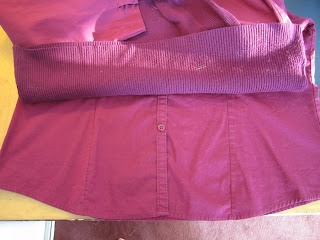
I hate this shirt too, also because it's too short.
By chance, I washed both of these shirts before I was going to take them to the Salvation Army then I realized something: they are both the same color. Hmmm...I wonder if I could make my own fooler top out of these two shirts? A fooler top looks like a button-up shirt and a sweater with the collar, sleeves and tails under a nice simple top but the fool is that it's only one top, not two.
So, I planned on making this the ultimate shirt: make it longer by sewing the "tails" from the button-up shirt onto the hem of the v-neck sweater to extend it, add cuffs to the ends of the sleeves and add the collar (like a dickie) to the neckline.
For this project, I used the two shirts, matching thread, scissors, a tape measure, a white dressmaker's pencil, a seam ripper, and my sewing machine. I also used a basic needle for hand-stitching.
Cutting:
To start, I cut off the first cuff. I went about 1 inch above the first cuff, smoothed out the fabric and cut it off.
I used the cut cuff to measure how much I needed for the second cuff (like a pattern) and then cut the second cuff.
(pardon the cat hair in some of these photos: my cat decided to sleep on both shirts last night)
Then, I looked at the hem. I measured (by sight) the approximate amount of fabric that I wanted from the button-up shirt.
Using the measuring tape, I measured 4 inches on both side seams and marked it with the dressmakers pencil. Then, I held the measuring tape horizontally between the two sides and marked a line.
I smoothed the shirt out well as I was going to cut through the two sides and then cut.
Last, was the collar. This was more difficult. I marked on both sides of the shoulders where I wanted to cut then went straight down to the first button from both shoulders. This cut through both sides.
Sewing:
Once I had all of the cut pieces, I used a zigzag stitch around all of the cut edges. If I had a serger, I would have serged them.
For the actual sewing, I started with the cuffs. I pinned the cuffs to the wrong side of the sweater on the sweater band so that it would blend in with the style of the sweater. I started with the buttoned side of the cuff.
At this point, I discovered that the cuff didn't fit on my sewing machine, so I sewed both cuffs on by hand with a needle and matching thread.
Once both cuffs were sewn on by hand, I did the collar. I pinned the fabric collar to the v-neck from the outside so that I could follow the line of the knit cuff on the sweater.
Once the collar was sewn on, the hard part began - the hem. I found it rather difficult as the button-up shirt was slightly bigger than the sweater. So, the first thing that I did was I lined up the side seams from both the sweater and the button-up shirt and pinned them together with about 2 cm seam allowance.
Once both side seams were pinned, I worked my way around the back then the front. I kept the same seam allowance so that it wouldn't be uneven.
Once it was pinned, I turned the shirt over to see how well everything lined up. I didn't want to be uneven on the sides and such. I made sure the the front was pinned so that it came out slightly, like a real shirt.
Then I sewed it down. Once I took the pins out though, I noticed that I had some overlap on the back:
So, on these "tucks", I took out the seams with a seam ripper and repinned them, this time with some give.
Then I sewed them back down again, stretching the fabric with my fingers as I went.
Lastly, I had to do something with the collar "dickie". It wouldn't stay in place when I put it on.
So, using the needle and thread again, I sewed it to the sweater along the lines. I didn't do it all the way down, just in key places I added a stitch.
I pinned it and added a stitch where all of the pins are.
Done!
(now you can really see how short the sweater was on me before this project)
Estimated time for this project: 2 hours. It was actually more for me due to the fact that the cuffs were sewn on by hand. The cutting took about 20-30 minutes (measuring and all that) with the sewing a bit more than that.
Notes:
- Next time, I will cut the collar closer to the seam so that I don't have extra fabric.
- A serger would be very useful to sew down the cut edges before sewing begins.
- When sewing the cuffs, be sure that the buttoned sides line up - either both facing out or both facing in.
- This could easily be done with a patterned shirt and a solid sweater, or vice versa. It can be done with old cardigans as well.


I loved this! Thank you. Love how you integrated your mistakes into the instruction. Wonderful. I am going to try this tomorrow with a few old white shirts and too short sweaters. This was really nice.
ReplyDelete