Showing posts with label house. Show all posts

Monday, March 26, 2012

The Monogrammed Laptop Sleeve

I made this red "M" laptop sleeve as a gift for a friend for her 13-inch Macbook. It is a fabulous personalized gift!


Needle: US8 24-inch circular
Yarn: Bernat Super Saver yarn in Burgundy (worsted weight)


Pattern:

Cast on 90 stitches. Knit for 8 rows.

Knit in stockinette (purl one row, knit one row) for 22 rows, finishing on the RS (Right side).

Start monogram (I used the letters from this website):
*Knit all even rows

Row 23 (WS, wrong side): p14, k6, p9, k6, purl to the end.
Row 25: Knit.
Row 27: p14, k6, p9, k6, purl to the end.
Row 29: p13, k7, p9, k7, purl to the end.
Row 31: p13, k8, p7, k8, purl to the end.
Row 33: p15, k8, p3, k8, purl to the end.
Row 35: p15, k9, p1, k9, purl to the end.
Row 37: p15, k19, purl to the end.
Row 39: p15, k4, p1, k9, p1, k4, purl to the end.
Row 41: p15, k4, p2, k7, p2, k4, purl to the end.
Row 43: p15, k4, p3, k5, p3, k4, purl to the end.
Row 45: p15, k4, p4, k3, p4, k4, purl to the end.
Row 47: p15, k4, p5, k1, p5, k4, purl to the end.
Row 49, 51, 53 and 55: p15, k4, p11, k4, purl to the end.
Row 57, 59 and 61: p13, k8, p7, k8, purl to the end.

Rows 62 to the end: knit even rows, purl odd rows in stockinette for about 5 more inches (about 40 more rows). Bind off loosely and leave a 2 foot tail. Sew the cover up on the wrong side along the edges using the mattress stitch then weave in all ends.


 Estimated time for this project: one week, that is, one hour per day for about 7 days.

Notes:
  • For any of the letters from the above website, you will need to knit them in reverse (top-down). Most of the patterns there are written from the bottom up.
  • The "M" design is (c) Rhonda K. White, done in 2005. Again, the link to this website is <http://www.knittingknonsense.com/M_cloth.html>. I do not claim this design as my own, I merely incorporated it into my laptop sleeve design.
Ideas:
  • This is a great unisex design for a Mac laptop sleeve. 
  • If you don't like the letters designed in the website credited in this post, you are free to try it with others!
  • For other computers, try this trick: cast on 7 more stitches per inch. This is for a 13-inch Macbook, but a 14-inch laptop would be 97 stitches, a 15-inch would be 104 stitches, etc. Also add 7 more rows at the end per inch to keep it even.

Sunday, March 4, 2012

How to find an organization scheme for documents

These days, we seem to be buried by things to organize - especially when it comes to paper, documents and bookmarks. We always say that we can't ever seem to find anything despite our best efforts!


Here is an idea: why not develop a plan for your paper and electronic documents? Some people develop a plan for one but neglect the other. This way, you know that if you have education related folders in the filing cabinet you also have them labelled the same way on your computer.


Here are some tips that I have learned over the past years when it comes to organization documents:
  1. Think of how you use these documents now and in the future. For example, if you are in school now you might not be in three years. So those files won't be used as often as they are now but you still want them in a place where you can find them.
  2. Also consider which documents you use often versus those that you don't. For example, you always need to find your taxes, paystubs and bills quickly versus old drawings that you did when you were five.
  3. Create a very basic organization plan. Use general headings and very easy organization. Here is a sample:
    • Learning applies to all levels of schooling, careers and jobs and research so all folders relating to these topics can go in this general group.
    • Self-Improvement applies to topics like finances, health, beauty, fashion, weight loss, etc. So all documents relating to these topics can go into this larger grouping. 
    • Planning applies to topics house/home, children, travel, holidays, car, etc. So all documents relating to anything that requires planning can go here. 
    • Entertainment includes all documents relating to movies, music, hobbies and any type of entertainment.
  4. Keep documents within three levels. This is an easy way to track your documents and a basic rule when it comes to web design as well. Here are a few samples:
    • Learning >> University >> Year 1
    • Learning >> Career >> Name of Employer
    • Self-Improvement >> Finances
    • Self-Improvement >> Health >> Menu Plans
    • Planning >> House >> Renovation 2008
    • Planning >> Holidays >> Christmas
    • Entertainment >> Movies >> Movie Stubs
    • Entertainment >> Hobbies >> Knitting 
  5. Use this plan for electronic and paper versions of your documents. Apply this to your bookmarks, electronic filing system and paper filing system. This becomes very useful because once it is in place, you know will have an idea of where to find something three years from now as well as tomorrow. 
  6. Write up your plan. Create a document that lists how your files are organized, both paper and electronic. This will help you out in the future.
  7. Put the plan into practice. Take an afternoon or two to put the documents into folders organized according to your plan.  
Hopefully, these tips are helpful for you to weed through those piles of documents and papers that you have.

Links:

    Friday, January 13, 2012

    What can you do with a T-shirt?

    The most useful item in a secondhand shop is a simple T-shirt. There are so many options and I am sure that this post doesn't even do it justice! This is actually my list of items that I want to make with T-shirts so stay tuned to the blog.

    Here are some of the things that I can think of on how you can reuse a T-shirt:

    As T-shirts:
    • Yoke-neck T-shirt: try this idea that details how to fix a crewneck.
    • Ruffled girly T-shirt: Cut part of the neckline away on an old T-shirt along with the sleeves. Take it in so that it is fitted then sew the sleeves back on in gathers. Do a ruffle with the leftover cut part from the neck back on. This is what I did with this T-shirt.
    • Remodeled men's T-shirt: this version has a ruffle, buttons and nice billowy sleeves.
    • Tucked neck: cut the crew-neck collar off then do a series of tucks around the neck (inspired by this T-shirt from calpatch on Craft Stylish).
    • Victorian ruffled T-shirt: first, fit it on the sides and the bottom to your figure. Save all of the extra fabric. Cut the crewneck off and sew the neck down to a more comfortable place, pin and sew down. Then add the extra fabric to make a ruffle down the front centre of the shirt like a Victorian top. Leave space in the middle and sew the ruffle to the shirt. Add buttons down the middle.
    • Smocking: add smocking! Anywhere! try the shoulder seams, under the bust, around the sleeves or all three options! I love smocking, it looks so cool.
    • Gathers: like tucks, you can get a large T-shirt and fit it by creating gathers on the sides, or perhaps just one side to create an interesting look. 
    • Dolman sleeved wonder: use two T-shirts to make a dolman-sleeved shirt. Stay tuned, I plan on trying this.
    • Baby doll T-shirt: take a really big men’s shirt and cut at bust line, fix sides and shoulders then sew arms back on and gather the shoulders. Then, leave bottom as one large connected piece and sew on with gathers so that it flares all the way around. 
    • Crocheted details: after adjusting a t-shirt, add crocheted details like a crochet neck, sleeves or hems. 
    • Piped details: add piping in contrasting colors around neck, arms and bottom of fitted shirts. Piping can be made from other t-shirts that are solid colours, or printed T-shirts.
    • Lace: take a T-shirt and cut off the sleeves, and cut it in half for a front and a back. Buy a sheet of lace in the same colour and cut to fit either the front or back. Then, sew to the shirt (either front or back), and reassemble the shirt. Take it in to fit on the sides, shoulders and sleeves. Fix the neck perhaps with some satin ribbon in the same colour around the edge.
    • Tank or racerback T-shirt: turn a men's T-shirt into a racerback tank top or a tank top. Perhaps even add details like a lace panel on the back or the front. 
    • Elastic: try adding an effect by sewing elastic underneath the seams on the neck (like this t-shirt) or on the sides (like this t-shirt)
    • Screen printing: try using fabric paint and a stencil or spray paint to create your own logos. Here is an idea on how to do it.
    • Beading: adjust the T-shirt to fit then add beads along the neckline, sleeves or anywhere else.
    Other clothing items:
    • Underwear: have you ever tried to make underwear from t-shirts? Here is a tutorial from calpatch.
    • Jersey skirt: what about cutting the neck off and using the arms as pockets on a T-shirt skirt?
    • Cardigan: a t-shirt can be cut up the middle and turned into a ruffly cardigan from this tutorial or a button-up one from this one.
    • Dress: turn two T-shirts into a dress. They could be the same colour or different and the connection between the two can vary from the waist or an empire waist. It can be fitted or not. Ruffles can be added along with other embellishments as well as darts.
    • Hairband: Use leftover scraps to make a hairband. This can be flat, embellished with beads, or braided. Along with many other ideas.
    As home items:
    • Cleaning rags: these make fabulous rags for dusting and polishing any surfaces and also for washing the car.
    • Cloth garbage bags: I am going to attempt these with leftover white men's T-shirts. I will post the results. I only plan on doing these for the smaller garbage bins around the house, not the one for the kitchen.
    • T-shirt quilt: if you can't part with them but they are taking up space, make a T-shirt quilt.
    • Lunch bag: try making a lunch bag (perhaps like this one) out of an old T-shirt.
    For ideas on what you can do with other clothes in your wardrobe or from a secondhand store, see my post on what you can do with secondhand clothing. This is everything else but T-shirts.

    Thursday, December 29, 2011

    2012: The Greatest Year Ever

    I've been doing some research on how to have the best year ever. This post and the 12 that follow will be a list of the best things to do each month of the year. Are you wondering which is the best month to get your coats dry-cleaned? Or what is in season when? I can never remember so this will be a learning lesson for myself as well. Hopefully this is useful to many people so that we can all have the best year ever.

    • January
    • February
    • March
    • April
    • May
    • June
    • July
    • August
    • September
    • October
    • November 
    • December
    (I will add the links once the post is done).

    Sunday, December 11, 2011

    Stopping static electricity in the winter

    We have a problem in this apartment once the snow begins falling: static electricity. We pet the cat and we pass a static shock or when we sit down on the couch. It drives me crazy! So, we looked up ways to get rid of it. That's when we learned that it is caused from a lack of humidity in the apartment, most likely because we closed the windows and it's cold outside.

    So, this is what we do come December until about March or April.


    We heat up a pot of water on medium heat and add 2 cinnamon sticks and whatever else I have in the house. Great additions are anise pods, nutmeg, orange peels (or any citrus peels), apple peels and dried herbs. The house smells fantastic and this eliminates the static shock.

    Notes:
    • Do not forget about the pot of boiling water!!! I did that with my copper Dutch oven only to find it completely ruined. Fill it with water every hour or so. Sometimes I put a kitchen timer on for an hour to remind me to come and refill the pot.
    • The water will turn darker with the addition of spices like cinnamon, anise and nutmeg. That's why the water in my pot is dark brown in the picture. Nothing is wrong with it, it's just been boiling down brown spices.
    • This does eliminate most of the static in our apartment. We have an 800 sq. foot apartment and this works for almost every room. For a larger space or greater effect, you may need an actual humidifier.

    Sunday, December 4, 2011

    How to reuse a planter

    Has your plant died recently? Or, perhaps you have planters lying around the house or garage just waiting for spring. Well, here are some ideas on what to do with those planters during the off-season -- or any time of the year.  

    1. Use it to hold vegetables in the fridge: despite what your planter is made out of (plastic, terracota, ceramic, porcelain, etc.) it can go in the fridge. Clean it, and use it to store items like apples, oranges, onions, potatoes, peppers and such. It actually helps you to organize your fridge.

       
    2. Use it to store cat or dog toys: every night, pick up the toys off of the floor and put them in the planter. Put the planter up high to store the toys and when you want them again, simply take it down and start tossing them around.

       
    3. Use it to display ornaments for Christmas: fill a cleaned planter with ornaments, pinecones or leftover garland and wrap a long ribbon around it, tied with a bow. Display as a table centrepiece or on a night table. 


    4. Use it as a transfer vessel: if you store potatoes, onions, pears, apples or anything else in another room, you need to put them into something to bring them to the kitchen. Clean a planter and use it as the transfer vessel. 

    5. Use it in your home organization: if you have a shed or a storage room, use it to store smaller items like tennis balls, paint brushes, tools and/or nails, cleaning cloths, etc. This is a bonus if your planter is meant to mount on the wall.  

    6. Use it to hold crafty or office items: this could be sewing thread, yarn, knitting needles, small bolts of fabric, embroidery floss, etc. It would be great for holding office supplies or scrapbooking supplies as well. Display it on your desk so that you items are within reach.  


    7. Use it to hold scraps of yarn: put the leftover bits of yarn in here for whenever you need a small amount to hold stitches or other uses.  


    8. Use it to hold small sports equipment in the summer: when you take the kids out to the park, use the planter to hold the baseballs, tennis balls, badminton birdies or other small items so that you don't loose them.


    9. Use it to hold fabric handkerchiefs: once you have a collection of fabric handkerchiefs you need to put them somewhere. Decorate the planter with a ribbon, clean the inside and store them all rolled up in here. Take one out whenever you need one.


    10. Use it to hold your keys or electronics by the door: everyday when you get home, put your keys, iPod, cell phone or other daily items here so that you always know where they are. Put the planter on a stand by the door and make a habit of always putting the items here. If you have a key ring, it's still perfect for the electronics. It's also great for holding gloves and scarves in the winter time.

      Tuesday, November 8, 2011

      Drawstring lunch bag out of leftover pant legs

      Back in August, I blogged about the capris that I created for myself as I had no shorts. Well, I used the leftover pant legs that were cut off the pants to make a drawstring lunch bag for myself. It is very easy to do as it is just a square bag with a drawstring.


      I made this the same way that I made my felt gift bags (so the directions are there) with these small differences:
      • I did a zigzag stitch around all of the inside seams to keep it from fraying.
      • I folded the top under twice to create a seam at the top but with enough space to pass a ribbon through. Once this was sewn down, I cut two holes and passed a ribbon through the same way that I passed the elastic through my remade white skirt. The ribbon acts as a drawstring.
      Estimated time for this project: about one hour. It took some time to measure out the fabric that I needed and to sew up the bottom (same as the felt gift bags). It also takes time to pass the ribbon through the top.

      Notes:
      • This could be made from almost any leftover fabric, I imagine. 
      • If I had made this from new fabric, I'd make it out of oilcloth.
      • To keep the ribbon in the bag, I knotted it at the ends but also close to the holes so that it didn't come out.

      Monday, November 7, 2011

      Pillow covers

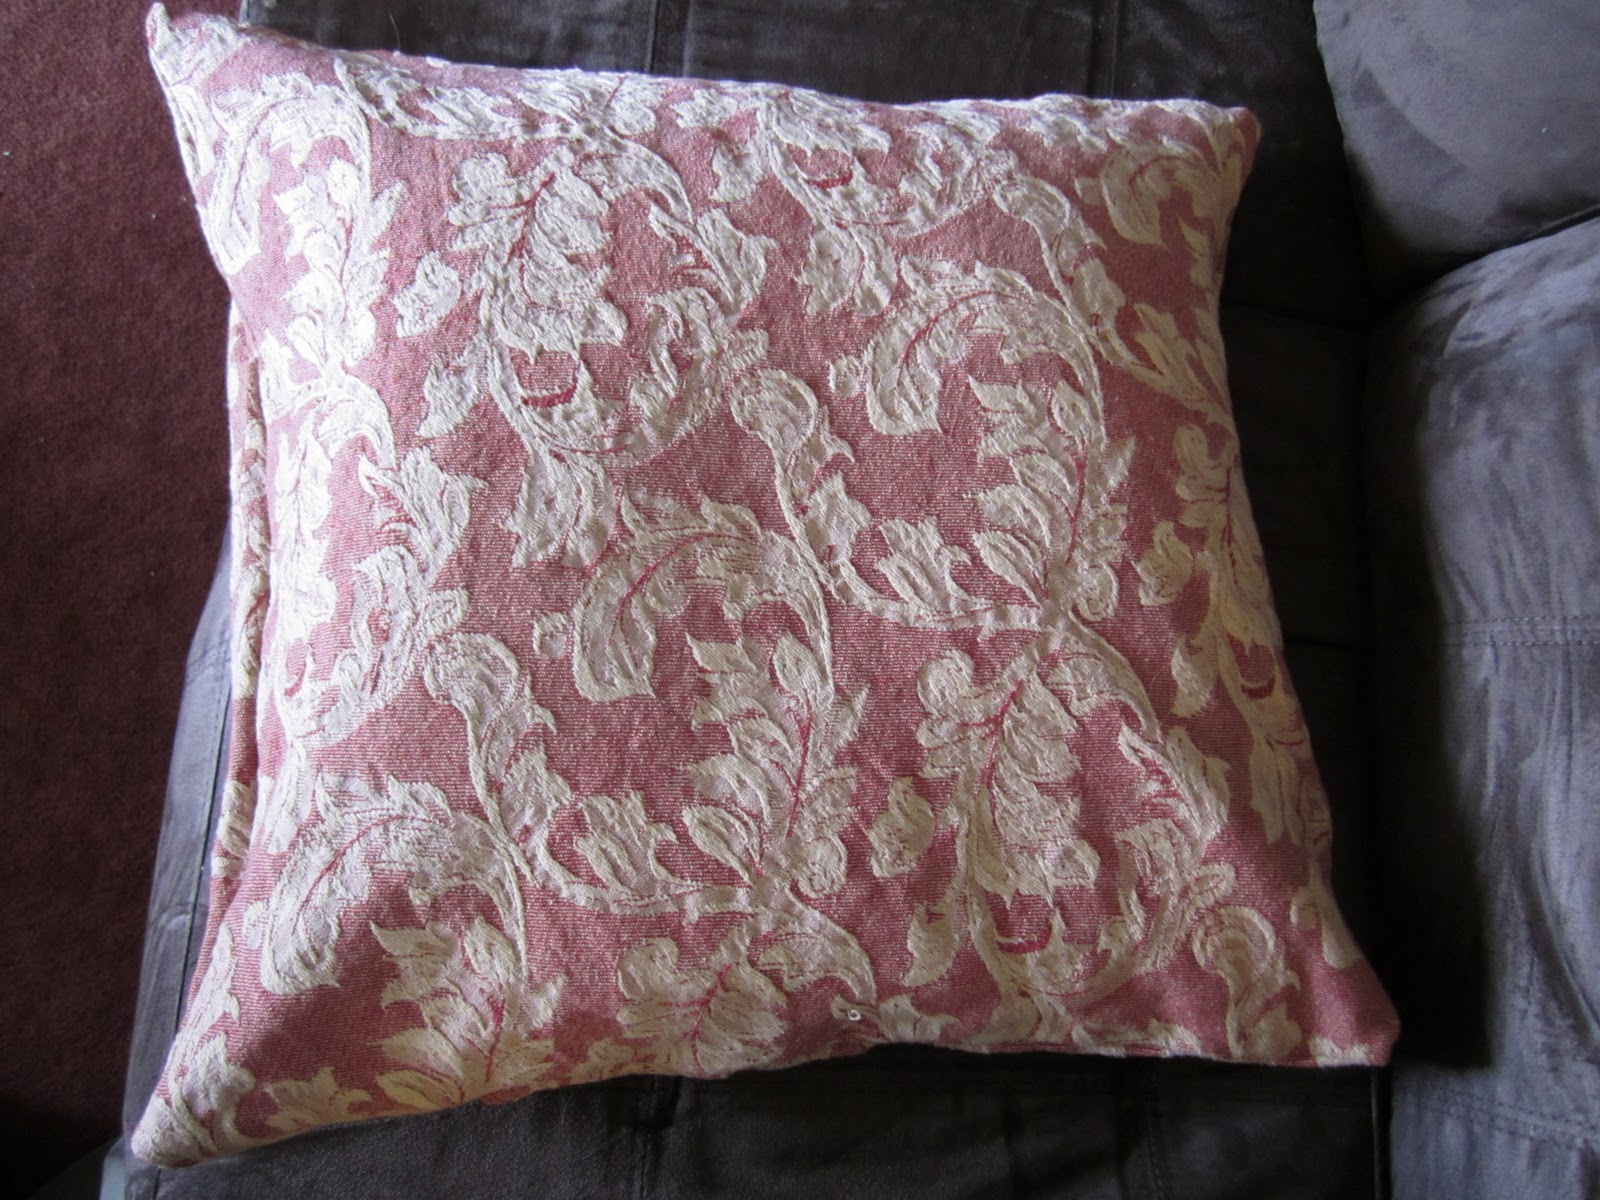
      This is a great project for decorating a room in the house. I used leftover pieces of fabric from various projects to make these covers and I can always wash them or change them whenever I feel like it.


      These are custom pillow covers as they will depend on the size of the pillows that you have laying around. For this project, I used one round tablecloth (about 1.5 yards of cotton jacquard fabric), matching thread for sewing, scissors, measuring tape and a dressmakers pen. Of course, pins and a seam ripper are used when sewing. Velcro is also useful but not necessary.

      Cutting and Measuring

      So, I started by measuring the pillow with the measuring tape to see where the seams ended. This pillow measured 16 by 16 inches so I made a measurement on the wrong side of the fabric for one square that measured 17 by 17 inches (front piece). I marked it with a dressmakers pen and cut it out.

      Next, I measured two more pieces, one for 17 inches wide by 8 inches (back piece 1) and another 17 inches wide by 12 inches (back piece 2). These will become the back of the pillow that overlaps.


      Sewing

      Now it's time to do the sewing. All of this is done on the wrong side. For the two back pieces, I took one of the edges and folded the seam down by 0.5 cm, then another 0.5 cm to cover the raw edges. I pinned the seam and sewed it down. I then did top stitching on the double seam. I did this on the second piece as well.

       
      Now, I took back piece 1 (which is the smaller piece) and sewed it to the front of the pillow with the two right sides facing each other. Next I pinned back piece 2 to the front (again with the two right sides facing each other) and sewed it to the front piece. It overlapped back piece 2 like so:


      Last, I sewed the entire edge of the pillow, now with both back pieces sewn to the front piece, with a zigzag stitch to keep it from fraying. I turned this pillow cover inside out and put a pillow inside. Done!

      Here is another pillow cover that I made from leftover fabric from my canvas fabric tiles:


      Estimated time for this project: 1 hour. It took about 20 minutes to cut this out then another 40 (or so) to do all of the sewing.

      Notes:

      • For the next ones that I make, I think that I will add some velcro to the two back pieces to seal it shut. 
      • These pillow covers bag over a pillow that is smaller than the cover. I find it unsightly so I try to make sure that the pillow fits the cover. 
      • A machine-washable fabric makes these covers delightful if you spill wine all over them. 

      Ideas:
      • I have plans to have pillow covers for the seasons and I can rotate them at will. 
      • I plan on making some pillow covers with stencils on them like my burlap garland and Christmas tree skirt.

      Wednesday, November 2, 2011

      Fabric Tiles

      What a great way to pull a room together: fabric-covered tiles. I had this idea awhile back as I had some canvas frames that I wanted to paint. I bought 4 large canvas frames from Omar de Serres for $20. Instead of painting them, I covered them in fabric like so:


      This is a fabulous idea because now I can change the decor in my rooms by changing the fabric on the frames instead of painting the walls, changing the drapes, etc.

      To do this at home, you will need a canvas frame, 1 yard of home decor fabric, a staple gun with heavy-duty staples, a hammer and small hooks to hang this on the wall.

      This project is really simple. Lay the fabric out on a table with the printed side face down. Lay the canvas face down on top of the fabric and cut about 2 inches extra on all edges then cut the fabric. Pull the fabric taught in the center of the top of the frame, check to see how the fabric looks by flipping the canvas over, then staple the center. Do the same with the bottom then the sides. All four sides are now stapled.


      Next, pull the fabric that is closer to the corners and staple that down. Do the corners by folding the edge in a 45-degree angle and stapling the fabric down. This is the result!


      Now, install the hooks for hanging this artwork on the wall. Most are pretty simple, this one only required for us to hammer it into the back of the frame with a hammer.


      Last, install the hooks on the wall to hang this up, match the hooks on the canvas to the ones on the wall and hang.


      Estimated time for this project: 1 hour. It really didn't take long but my husband and I did this together as it was easier that way.

      Idea:
      • Once fabric is stapled to the canvas, you either have to remove the staples to recover it or recover it with the original fabric still on the canvas. I had an idea of making a cover for the recovered canvas with elasticized corners and a white lining to hide anything underneath. I will test this theory and post the results.

      Sunday, October 30, 2011

      Stenciled Snowflake Shower Curtain

      Christmas is my favorite holiday. I think that each room should have a little bit of cheer so I came up with this idea. I don't like displaying Santa's everywhere but I do like a touch of winter or Christmas to remind us of the season.


      For this project, I started with a white fabric curtain, a snowflake stencil, a stipple stencil brush, green craft paint, tape, and a small container for paint. We had no newspaper in the house so we used old towels. A large, hard work surface is also useful: I used our dining room table.


      I set up the towels on the table then pressed the shower curtain to get rid of all of the wrinkles. I also cut my stencil sheet.


      Next, lay the shower curtain out over a large surface like the kitchen table.


      Add tape to the bottom of the stencil to tape it to the shower curtain. 


      I decided to do a cluster of 5 different snowflakes all over the shower curtain instead of stenciling the entire thing. My husband helped me with the painting which was wonderful!


      I started in the top right-hand corner so that I could work my way to the left. I squeezed some paint into a container (for me this was a small glass mason jar), got some paint on my brush and I started stippling the paint over the stencil. I found the best way to do the stencil was to start with the corners then work my way in to the center.


      After the stencil was done, we lifted the stencil and tape from the shower curtain and moved it to another spot and continued stenciling.


      We did clusters of the snowflakes, going down the edge, doing the bottom then working our way in. We didn't want to cover the entire shower curtain in snowflakes.


      Our only issue, of course, was that Felix wanted to burrow under the draped shower curtain so we rolled it onto the table so that it didn't drape over the sides. 

      Once all of the "clusters" of snowflakes were done, we took another stencil and filled in any gaps with another snowflake stencil.

      Estimated time for this project: 2 hours 30 minutes. It took time to set everything up and about an hour to do the actual stenciling for two people. It also took time to clean up after (container, brush, stencils and table).

      Notes:

      • It was extremely hard to find a white cotton fabric shower curtain. I ended up with a white curtain liner made out of 100% polyester but it took the paint well. 
      • I used green acrylic paint. I couldn't find any fabric paint in a color that I liked. This most likely means that this will be a spot-clean shower curtain and cannot be laundered in the washing machine or dryer.
      • Keep your hands clean while stenciling. We did this while we were cooking lunch so we were constantly cleaning our hands. 
      • Don't worry if a stencil isn't perfect. I made some mistakes on this shower curtain but you can't see it from afar. Even so, it's a sign that it was homemade by you. Here's one of my globby mistakes:

      10 projects that I want to do in 2012

      I love searching for new project ideas and these are some of them that you may see from me within the year. These are 10 projects that have my head spinning with fabric choices and ideas. This will also be a way for me to keep track of these projects for when the time comes:
      1. Fleece argyle blanket: this idea is on CraftStylish and doesn't require any sewing at all. I love anything having to do with argyle. 
      2. Pet sleep sack: I have some fake fur lying around and with leftover fleece from the argyle blanket, I can whip up this sleep sack in no time.
      3. T-shirt into a Tunic: Calpatch is my favorite contributor on CraftStylish and I absolutely love this t-shirt. 
      4. Kitty litter rug: I have an old towel lying around waiting to be upcycled into this litter rug. Felix (my orange/white tabby) doesn't like the litter mat that I bought him into Wal-mart.
      5. Felted ball garland: I have never felted before but I love the idea of making felted balls into a Christmas garland. I like the look of it.
      6. Stenciled wood coasters: I see these wood coasters on Etsy and they inspire me to stencil them and use them around Christmas time or to give them as gifts.
      7. Coffee cup sleeve: I love this coffee cup sleeve and it might have better grip on a coffee cup than a knitted coffee cup sleeve. 
      8. An apron for myself: I made one for my husband (actually, I made him three) but I haven't made one for myself. My husband has a pink dress shirt that is now too big for him so I will be making one soon. 
      9. Remolded crayons: after my post about crayons, I just have to make this at home! I have two nephews who would love this.
      10. Dryer sheet sachets: I don't want to use dryer sheets anymore so I want to make a green project like this one.

      Saturday, October 29, 2011

      60 minutes of Exercise per day

      Earlier in 2011, the Canadian Society for Exercise Physiology announced that children should aim to get 60 minutes of exercise per day in order to lead a healthy life and ward off weight gain. I was intrigued by this for adults as I do try to get at least 30-45 minutes of exercise per day. I know that it is not easy for everyone though as we all have busy lives. So, I want to brainstorm ways to get 60 minutes of exercise per day -- for everyone.

      Morning:
      • Get up 1 hour earlier and do a 45 minute workout on a treadmill, elliptical or other home gym equipment (45 minutes). 
      • Get up 1 hour earlier and take a swim at the local pool (30 minutes). 
      • Lace up your shoes and go for a 45 minute walk, jogging or run outside (45 minutes).
      • If you take public transit, get off the bus one or two stops early and walk (10 minutes).
      • Do a quick vigorous clean of the kitchen, dining room and living room (15 minutes).
      • Take the dog for a 30 minute walk, run or jog (30 minutes).
      Break:
      • Take 15 minutes and run up and down the stairs (15 minutes).
      • Take 15 minutes and go for a walk (15 minutes).
      Lunch:
      • On your 1 hour lunch, go for a 30 minute walk, jog or run outside (30 minutes).
      • On your 1 hour lunch, go to the gym for a 30 minute workout (30 minutes).
      • On your 1 hour lunch, take 30 minutes and run up and down the stairs (30 minutes).
      • Get a friend and play at 30 minute game of badminton on your lunch (30 minutes). 
      • On your lunch, take a class at a local gym (45 minutes).
      Break:
      • Try any of the above options.
      Evening:
      • Before supper, do a 30 minute workout (30 minutes). 
      • After work, take a class at a local gym (45 minutes). 
      • If you are stopping off to pick up a few things, park at the end of the parking lot and walk further to and from the store (10 minutes).
      • If you are shopping, take the stairs instead of the escalators (5 minutes). 
      • Try a 30 minute boxing session at home or at the gym (30 minutes). 
      • Play a game of bowling, baseball or boxing on the Wii with your kids (30 minutes). 
      • Take an evening dancing class (60 minutes).
      • Take in a seasonal activity with the kids (skating, skiing, swimming, rollerblading, jumping rope, etc.) (30 minutes).
      • During the kids' favorite TV show, lace up your sneakers and go for a run or job with a friend (30 minutes). 
      • Take the dog for a 30 minute walk, jog or run (30 minutes).
      Everyday calorie counts for 30 minutes (150 lb woman):
      • Card playing: 54 calories
      • Child care: 102 calories
      • Cleaning, moderate effort: 118 calories
      • Cleaning gutters: 180 calories
      • Construction/Remodeling: 198 calories
      • Cooking or food preparation: 85 calories
      • Driving: 72 calories
      • Gardening, general: 169 calories
      • Ironing: 72 calories
      • Loading/Unloading the car: 108 calories
      • Mopping: 153 calories
      • Mowing the lawn (push mower): 187 calories
      • Packing suitcase: 72 calories
      • Painting house: 171 calories
      • Playing board games: 54 calories
      • Playing piano: 95 calories
      • Playing with children: 134 calories
      • Pushing or pulling a stroller with a child: 85 calories
      • Putting away groceries: 90 calories
      • Raking the lawn: 134 calories
      • Reading: 36 calories 
      • Sex, intercourse: 144 calories
      • Shopping: 81 calories
      • Shoveling snow: 207 calories
      • Showering: 144 calories
      • Sitting, playing with children: 85 calories
      • Sitting, resting: 36 calories
      • Sweeping: 134 calories
      • Tailoring, cutting: 90 calories
      • Talking on the phone: 36 calories
      • Touring/Traveling: 72 calories
      • Washing the dishes: 76 calories
      • Writing: 36 calories
      Links:

      Thursday, October 13, 2011

      10 cheap, homemade present ideas for kids

      I like making my gifts because I think that they mean more to the recipient. Of course, gift cards and toys are always acceptable and I am not saying that everything has to be homemade, but these are the gifts that they will most likely remember and keep.
      1. Scrapbooks: I am making this for my nephews this year and I hope that they will enjoy it for years to come. I also plan to do this with my kids: each one of them can get a scrapbook detailing the past year for Xmas so that when they leave the nest they have these gifts. If you don't have time to make a scrapbook, a photo album always works too.
      2. Re-molded crayons and coloring books: what a great way to use up old crayons! The blog notes that this works best with Crayola or another good name brand of crayons and perhaps not with cheaper Dollarama crayons.  
      3. T-shirt tote bags made from their favorite t-shirt which was stained, too small or wore to rags. This way they can still have happy memories of that shirt for years to come, even if it doesn't fit.
      4. Clothes: whether bought or homemade, they are always welcome, especially if their favorite super hero or cartoon character is featured. You can always take a plain t-shirt and buy some fabric with their favorite super hero or celebrity on it. Cut out an image from the fabric and sew it onto the front of the plain t-shirt for a custom shirt that they will love. This is even better if you make a pair of pajama pants to match.
      5. Room sign: make a sign for the door into their room. I used to do this in camp on a piece of wood that we painted with our names and splattered our favorite shades of paint all over it. I still have it and I remember thinking when I was a kid that it was the coolest thing ever that I could display on my door.
      6. Knitted or crocheted blanket: you can make kids a cozy blanket out of their favorite colors. I made one of my nephew and I made it big enough for him to use until he's in his teens. I did a subtle ribbing pattern on it.
      7. Christmas ornaments: make one every year since your child was born with the date on it so that when they grow up and leave the house, they already have a small collection of ornaments for their own tree. This could be as simple as wooden snowflakes that you have painted white and wrote the name and date with a gold pen on the back. You could use that same gold pen to outline snowflake details on the front too.
      8. Room decorating: all kids like to decorate their room. What about if your Christmas gift to them was a redecoration of their room? That means paint, wallpaper (maybe) and perhaps a few matching items for their room. You could wallpaper the back of the door or the back space of the bookshelves for dramatic effect.
      9. Personal plates: do up their own place setting with a cup, mug, plate and silverware. You can buy these now in craft stores and paint them yourself then fire then in the oven or glaze them. Do a nice design on them so that they look forward to eating everything on their plate to see that design (we wish!).
      10. A candy or cookie bag: make their favorite cookies or homemade candies, bag them up and put them in their stocking for Christmas morning. I can remember fudge, truffles and snickerdoodle cookies being my favorite and we only ate them at Christmas.

      Friday, September 23, 2011

      Reusing Small Containers

      Sometimes, small containers are the hardest to reuse. They are too small to hold some things, and too big to hold others! Here are 10 ideas that I can think of for reusing smaller containers.

      1. Use it to hold game pieces like checkers, chess pieces, mosaics or poker chips.
      2. Use it as a money bank for the kids. Once it is full, empty it on the floor with the kids, separate out the pennies, nickels, dimes and such then roll them up. I still do this with my dad.
      3. Use it as a discipline tool for the kids. My mom used to do this with little orange plastic chips used in games. We had to earn the chips with chores and each of us had a little “bank” (enter the small container) with a slot cut into the top. We could cash in the chips for rewards like a trip to the mall for new clothes, supper in our favorite restaurant, hair coloring or a movie.
      4. Use it at your desk to store small portions of snacks like almonds, pistachios, wasabi peas or peanuts.
      5. Save them and take them with you to the beach in the summer. Let kids use them as molds when making sandcastles.
      6. Reuse it as a water or food dish for the pets.
      7. Reuse plastic gum containers (such as 60-piece Juicy Fruit or Excel ones) to dispense more gum or snacks like nuts, seeds or wasabi peas. Wash and reuse.
      8. Reuse it to make a signature coffee or hot chocolate mix. You can make it at home and spoon it out at work. Once it is gone, just take the container home, wash it and make more.
      9. Use them in crafts to hold buttons, needles, beads, stitch markers, or other doodads.
      10. Use them in the garage to separate out different sized nails, washers or bolts.