Showing posts with label green. Show all posts

Tuesday, October 9, 2012

Organization for scrapbooking scrap paper

I love scrapbooking but I have to say that the worst part is organizing all of the little bits that are cut off of the sheets of expensive paper. I spend half of my time trying to find white or cream-coloured scraps for journaling! So, I finally got so fed up that I made a connection between my empty poly expanding file organizer and my scraps: why not organize the scraps in the expanding file organizer?


There are 13 tabs in my paper organizer. I took a quick look at my paper scrap collection and came up with these categories:
  1. White
  2. Cream
  3. Yellow and Beige
  4. Red
  5. Pink and Purple
  6. Blue
  7. Green
  8. Brown
  9. Black
  10. Other: for all of the aqua, orange, grey and other colours that were not included
  11. Embellishments
  12. (and 13) Patterned: there were actually two pockets here so I organized it by the paper kits and the scrap pieces of patterned paper 
Then, it was a matter of organizing the paper scraps into the expanding file once I relabeled it according to the above categories. 


To this:


It took me about an hour to sift through my piles of paper scraps and organize them into these categories. Now I can get scrapbooking!

I hope my adventures in craft organization inspire you to do something similar! It's always great to bring order to chaos and get to work crafting instead of organizing the craft!

Thursday, February 23, 2012

T-shirt tote bags

This project is inspired from one that I found on the web on how to create a tote bag out of kids' outgrown t-shirts. So, I took 4 of my nephews' old t-shirts that were about to go to the Salvation Army and I whipped this easy project together in one night. Now they can use these tote bags to carry books, lunches, toys or anything else!

You can find the tutorial on how to do these here.

Here are some pics of mine! I sewed the cut edges down which was not done in the tutorial but otherwise it's the same.


Saturday, January 28, 2012

How to cover a scrapbook with T-shirts

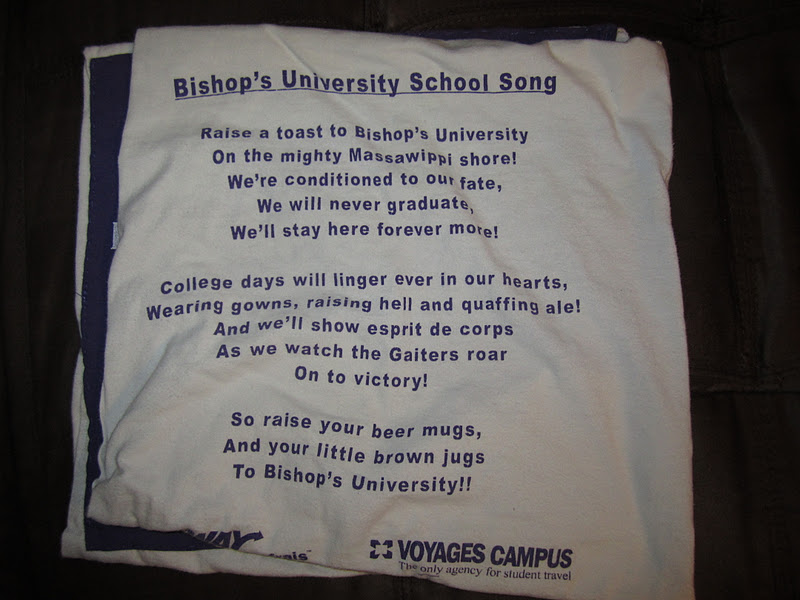
This is my university scrapbook. I got this kit for Christmas one year and I wasn't going to let it sit there because I didn't like the cover. I kind of decided a long time ago that I was going to cover it with something then I realized that I still had two of my old t-shirts from university.

 (before)


 (after)

Then I got this idea: use the T-shirts to cover the scrapbook. Brilliant! You'll have to pardon the lack of tutorial photos though as I did this project before I started this blog.

For this project, I used two old T-shirts, matching thread (in this case, purple and white), a sewing machine, scissors, and the scrapbook that needs to be covered. A measuring tape and white or blue dressmakers pencil also came in very handy.

Cutting:

As I mentioned, please pardon the lack of photos for this part. What I did was measure the height and width of the scrapbook then put those measurements on the front and back of each T-shirt, marking the edges with the dressmaker's pencil. Then, I cut out 4 squares with at least 1 cm seam allowance on all sides.

Sewing:

As there was screen printing on the front and back of both T-shirts, I decided to have the white shirt on the outside cover and the purple shirt on the inside cover. I wanted to keep the print facing out. 

I pieced together the two white pieces for the outside cover and pinned them together on the wrong side where the seam for the spine would be and sewed them up on the sewing machine.


Next, I took the two pieces of the purple shirt (which will be the inside) and I pieced it onto the white shirt to see where the seams would be. I then pinned the seam facing the inside spine and sewed it down with matching thread on the sewing machine. For one piece this was the far right side, for the other one it was the far left.


Then came the easy part. I turned both the white and purple shirt pieces inside out and pinned the front cover pieces on the wrong side up the seam with 1 cm seam allowance. I sewed this up on the sewing machine then did the same with the other two pieces. I now had a white outer cover and purple inner cover.


Again, I apologize for the lack of photos for this tutorial but I do have another scrapbook to cover and I will take pictures of that one.

Estimated time for this project: about 1 hour.

Notes:
  • This is really easy when you use measurements of the scrapbook that needs to be covered. 
  • If you want to serge any edges that is fine too, notably the edges of the white shirt around the spine. 
  • This cover is washable as the T-shirts were washable. 
Ideas:
  • The possibilities for this are endless. Use your kids' old t-shirts to cover a small scrapbook for them, use your favorite t-shirts from high school to cover a high school scrapbook, etc. If you get t-shirts from a conference or camping trip that you want to remember, use them to cover the scrapbook. 
  • You could even take a white t-shirt, paint it or stencil it then use it to cover a scrapbook. 
  • You can dye fabric and use it to cover a scrapbook.

Friday, December 23, 2011

9 Christmas gifts you don't have to buy

Well, it's that time again. It's time to go shopping for presents for our loved ones. We stand in long line-ups then race home to wrap it all. It's very stressful as we hope that the recipient will like what we bought them.

I'm not denying that I do this but I have been undergoing a transformation as of late: what about giving presents that you didn't buy? You may think that I am crazy but sometimes the best presents are ones that don't come from the store. What do I mean? Well, here are some ideas that might spark your imagination.
  1. Jewelry: an item that was worn by a relative or important family member means more than buying the latest rock. I still get tears in my eyes every time I think of my necklace - it came from my great-aunt. I never take it off. Nothing that was bought can replace that connection.
  2. Used hobby items: last year for Christmas I got my great-aunt's old knitting needles and it was the best present ever. Of course, I could buy an entire set into a craft store but she actually used these over the past 50 years. Now I am using them. All my mom had to do was fish them out of the closet! Other great items are pinking shears, scissors, pins, crochet hooks, yarn, fabric, books, patterns and such. If they are sitting around and you know someone who is interested in these items, gift them!
  3. Dishes: for our wedding, we received a butter dish from an older lady who had originally received it for her wedding 54 years ago. This became a treasure in my house. Dishes last for such a long time and can be passed down in the family -- especially if they come with a special story.
  4. Photos: old family photos are a real treasure. Sometimes everyone wants a copy of each photo, so why not go and get copies made of the old family photos and give those in a nice photo album?
  5. Recipe cards: look for the old recipe cards that your grandmother or other family member wrote on. To make this present extra special, include the card (or a really good scan of the card) along with the item itself, made from the recipe. For example, grandma's fruitcake recipe with a fruitcake that you made.
  6. Ornaments: just like dishes, some ornaments are treasures that were given to you by someone special. This is a great idea for whenever a grandparent passes away to give your children an ornament that they gave you one year. Perhaps include a few pictures of the grandparent and you with the ornament.
  7. Furniture: if you have an item that was passed down in the family or bought from an antique furniture store, why not give that? It could be grandma's dresser or end table that will make someone else's day.
  8. Articles of clothing: vintage clothing is very popular right now and you may have some items that you inherited or that you bought a long time ago but don't wear anymore. Some great ideas are purses and accessories but also shirts, dresses and such. I know that even if I don't like the item, I can remodel it and it is still something that my mother wore.
  9. Blankets or quilts: family quilts are heirlooms. So are blankets, especially ones made by a grandparents.

Tuesday, December 20, 2011

10 frugal ways to decorate for the holidays

The holidays are approaching and it's time that we deck the halls to celebrate. Sometimes that stuff is expensive or the decorating ideas that we have cannot be realized with the budget. But, no fear! Here are 10 ideas of how to decorate on a tiny budget.
  1. Pine cones: take a trip to the local park or an area that has lots of pine trees with a few garbage bags or boxes and collect the nice pine cones. Really look them over for bugs, mold or any imperfections before bagging them. Bring them home and wash them in a sink of hot water (when I did this, they closed up but reopened as they dried a day later). Then, use them in leftover planters, vases or jars tied with ribbon.
  2. Cookies: make a few batches of sugar cookies and decorate them with icing done in your Christmas colors. Before baking them though, put a hole in the top with a wooden skewer. Do designs like snowmen, reindeer, snowflakes, ornaments, or words. Once the icing is dry, string them up with leftover yarn, ribbon or twine and decorate the tree with them. Or, just display them on nice cake stands on the table.
  3. Food: create nice displays around the house with clementines, apples, or other seasonal fruit and vegetables. Use vases, jars or cake plates and place them carefully. If you really want to get into this, cover the items with powdered sugar or salt to create the glittery effect.
  4. Stockings: make this year's stockings out of old sweaters, t-shirts or button-up shirts. If they aren't the right color, you can buy fabric dye and follow the package instructions to dye the fabric. Sew up with a sewing machine and decorate with ribbon or felt accents.
  5. Centrepieces: take some mixing bowls and fill them with Christmas ball ornaments, pine cones, greenery or other items. Or, pack them with a mix of Christmas ball ornaments, apples and other items. Place in the centre of the table. Also, add bowls or planters of ornaments to end tables, magazine tables and other places around the house.
  6. Wrappings: try some of the tips in my post about green wrappings along with embellishments like yarn pompoms, Christmas ribbon made from old shirts and other festive touches.
  7. Tree: get an artificial tree with lights so that you buy it once and use it for at least 10-15 years. Decorate with ornaments, cookies, gingerbread men, pine cones or (if you want to be really traditional) strings of popcorn or cranberries. You could also decorate with paper snowflakes made out of white paper, dolls, clocks, etc. The options are endless, but start with your favorite colors and a theme.
  8. Table: use a clean white tablecloth and use your best dishes but have little touches here and there like candles, decorated paper tags for guests, napkin rings, etc. The food should speak for itself, you don't have to have the table fully decked to the nines.
  9. Rooms: add a little touch of the holidays to every room like a special cup towel in the kitchen, or towels in the bathroom. As long as everything is clean and organized, it looks fabulous and doesn't cost hardly anything. You could even do this with well-placed Christmas cards that you received.
  10. Outside: depending on your location, try LED lights and topiaries. Or, you could make a wreath out of leftover strips of fabric in your color theme wrapped around a Styrofoam wreath form. You can also put out bowls of ornaments by the entrance.

Monday, December 19, 2011

10 (mostly) paperless ways to wrap presents

Christmas is so exciting but usually after all of the presents are opened, this is the scene:


Eco-guilt sets in. Especially in some parts of the world where this paper is sent to the dump instead of recycling. Well, what else can we use? Here are 10 mostly paperless (and re-usable) ideas for wrapping presents that can work for almost any holiday (not just Christmas):
  1. Old paint cans: Clean them out well and take the label off. If you need to remove any sticky goo then you can get a product to do that. Get two cans of spray paint: one a primer and the other in a color of your choice. Then, spray the paint can first with the primer, allow it to dry, then paint it with the second color. After drying, find a present and some embellishments!
  2. The wrapped box: instead of ripping the wrapping paper off of a box, pick some that have lids like shoeboxes and wrap the box. Wrap each part (the box and the lid, or just the lid) separately so that you can reuse it every year. Tie it shut with ribbon, twine or yarn and add a tag and embellishments.
  3. The colorful box: you can buy boxes in almost any store (Zellars, Walmart, Dollarama) that have a decorated lid and a bottom. So, instead of wrapping it like the above option it is already done for you.
  4. The paper bag: try this tutorial that I did for painting a paper bag.
  5. Fabric bags: try this tutorial that I did for making reusable fabric bags.
  6. Felt gift bags: try this tutorial that I did for making felt gift bags.
  7. Mittens, scarves, hats, etc: wind a scarf around a box and tie it with ribbon or stuff a mitten and carefully fold it over. This way, the present (and the wrappings) are one and the same!
  8. Dishcloths, dishtowels, etc: In addition to mittens and scarves, try wrapping the smaller presents in dishcloths and tie shut with twine, ribbon or yarn. You could also use towels, shower curtains, tablecloths or bolts of fabric for the larger presents.
  9. Storage boxes or cubes: try buying a set of these (that are part of the gift), add the gift, close and wrap a ribbon around it. If you are gifting a cube, basket or such then cover the top with fabric to hide the gift then add the tag and an embellishment.
  10. Reused materials: every Christmas, save the gift bags and wrapping paper so that the next Christmas, you can reuse them. We do this at home and these materials are used to wrap presents (mostly stocking stuffers) for the family.

Saturday, December 17, 2011

10 Fabulous Cheap (and homemade) Cat toys and treats

I decided that it was time to make some toys for my cat. I have lots of things around the house that I want to reuse or get out of my fabric stash.
  1. Shoe box toy from this website
  2. A stuffed sock.
  3. A fabric ball: take a scrap piece of fabric and stuff it with some wadded up paper, aluminum foil or other scrap fabric along with some catnip and some noisy bells. Sew it up to form a stuffed ball and toss that around for the cat.
  4. Any object made from eyelash yarn (bonus points if that is glittery or shiny eyelash yarn).
  5. A twist-tie: just make sure that it has no exposed metal ends. I'm rather paranoid about that.
  6. The cursor on your computer screen: ever notice how a cat really goes for that little moving arrow on your laptop? Mine sits next to me and watches it move around so I let him try to attack it - provided that he keeps the cardinal rule of never stepping on the computer keys. 
  7. Crumpled up balls of aluminum foil or wads of scrap paper.
  8. Leaves or pinecones from outside
  9. Feathers (or objects that have feathers on them). 
  10. An old tie. We don't use string as I knit but dragging an old tie around on the floor works wonders.
Ideas:
  1. Homemade cat toy ideas
  2. Homemade cat treats.
  3. Top 5 Do it Yourself Cat Toys

Sunday, December 4, 2011

Stenciled brown paper bag

I was about to throw this bag out when I remembered that Christmas is coming and I needed to wrap some items. So, I got out my stencils and started painting. Why not reuse something like this? It's just going into the recycle anyways.


For this project, I used some leftover newspaper, a stipple stenciling brush, acrylic paint in pink rose, an orphaned container to hold paint, tape and plastic snowflake stencils.


I used the same method as I did for my snowflake shower curtain: use the tape to adhere the stencil to the paper bag (in this case), use stipple brush to paint the stencil, remove stencils and then let it dry.


Stencil the back then the two sides. Done!

Estimated time for this project: about 1 hour, including drying time for the stencils. It was a very nice Saturday afternoon project!

Notes: 
  • There was a hole in the paper bag where a staple had fastened it shut but I stenciled over it to hide it. 
  • I have to note to properly clean that stipple brush after painting with it. I now have dried paint goo in it and once it's dry, it's hard to remove. Note to self!! 
  • To wrap, simply place the item in the bag and roll the top down. Staple or tape into place and add a pink yarn pom-pom or some other pink bow and a tag (perhaps a monogrammed felt one?).

Ideas:
  • This will work with any stencil and almost any color paint. I did this in pink to match my mom's Christmas decor as that is where I will be this year. However, I could have easily did this in red or brown for my own Christmas colors. 
  • Every time a brown paper bag comes into the house, save it for this project. This one was used to deliver Thai food to my door. It wasn't stained so I reused it. Can you imagine how many bags you'd have if you use them for your groceries or delivery? You'd never need to buy wrapping paper again.

Christmas ribbon out of old men's shirts

I took one of my husband's old, ratty button-up shirts and turned it into long strips of Christmas ribbon for myself. I can use this fabric ribbon over and over again to wrap presents or as part of my everyday decor. It's easy to make too!


For this project, I used 1 old men's dress shirt that matched my Christmas decor, scissors, an iron, matching thread, pins and a sewing machine. A seam ripper, measuring tape and dressmaker's pen would be helpful as well.

To start, I took an old dress shirt (that happened to be in my Christmas colors, cream and red) and cut it into pieces like I did to prepare for my apron. Next, I took the back and cut out strips that were about 20 inches long and 3 inches wide (I needed at least 1 cm on each side for seam allowance). I was lucky because I had a fabric that was checker-print so I just followed the lines. If you don't have this, mark the measurements on the wrong side with a dressmaker's pen and then cut out.

Ironing

Now, I got out the iron. I really hate ironing but this time I did it. I pressed each strip with the seam allowance (1 cm on both sides) so that it would be easier for me to sew it down.


Sewing

Next, I threaded the sewing machine with matching thread, pinned the ribbon and sewed the seam allowance down. I sewed it first very close to one edge, then close to the other for top-stitching. Since it was all ironed down, this was very easy.

That's it! That is all that it took to make these strips of ribbon.

Estimated time for this project: an evening or about 3 hours. It took time to cut up the shirt then cut the ribbon out. Ironing took about 15 minutes then it took about 2 hours for me to sew them all up. For one ribbon, I'd say that it took about 45 minutes.

Ideas:
  • You could easily do this with old dress shirts (or pants, skirts) in solid colors or patterned or old skirts, pants, etc. 
  • You could try different textures like tweed, corduroy, jean, etc. Mine is a fine whale corduroy.
  • You could sew smaller strips together to make a longer ribbon. 

Sunday, November 27, 2011

Embroidered Felt Gift tags

This was a great idea that I had to use up leftover felt from my Felt Gift Bags. These are green, reusable gift tags that I can embroider and monogram with the recipient's initials and then use it every year. I can ever color-code the embroidery floss by person (pink for mom, green for dad, purple for myself, etc.). What a great idea!

For this project, I needed strips of leftover felt (cream felt is best), embroidery floss in colors of choice, an embroidery needle, a hole punch and scissors.

To start, I needed tags. So, I took the scraps of leftover felt and cut a tag for a template, about 1.5 inches wide by 3.5 inches high. I simply took a scrap, folded it over and cut to those dimensions.


Once I had the first tags cut out, I used them as templates and cut out more to those dimensions.


Once I had a stack of tags, I had to give them a hole. I took a single hole punch, positioned it and punched a hole. It took a lot of strength (and it did hurt my hand) but I did make a hole. For a few of them, the punch didn't go through all of the way so I used scissors to cut the hole out.


Now that I had some tags with a hole, I got out the embroidery floss and a needle. I cut a length of floss and split it into three threads (it is usually wound with six).


I did a running stitch border around the edge with the embroidery floss and around the punched hole. I now have tags that look like this:


The back looks like this:


I didn't monogram these yet but I think that I will with the first initial of the recipient. I think that I will also color-code these so that each person has their favorite color. I can pick whatever style alphabet that I want for the letters and I am thinking of a nice, modern font.

Estimated time for this project: about 30 minutes for one. It doesn't take long to cut these out, but hole punching can be hard. The actual embroidery took about 20 minutes as I didn't do a quick running stitch -- it looked sloppy. I took the time to put the needle in and out.

Notes:
  • I did the embroidery around the hole punch in the beginning as a detour then continued around the edges again. You can see that in the above picture. 
 Ideas:
  • You can do this in your Christmas colors instead of color-coding it. 
  • This would look excellent with a darker felt and lighter embroidery floss. 
  • This is a fabulous idea for using up leftover pieces of felt. You can do it in any color with white embroidery floss.

Tuesday, November 22, 2011

Fabric Christmas Gift Bags

Last year I started making fabric Christmas gift bags instead of wrapping presents in reams of paper every year. I think the eco-guilt finally got to me one Christmas when I saw all of the ripped paper lying around the floor. Here is an insanely simple drawstring bag that you can use for wrapping Christmas gifts. I make them in all sorts of sizes for stocking stuffers or gifts but the basic principle is the same.


(made for wedding scrapbook gifts)


(made from leftover pant legs - what can't you do with leftover pant fabric?)


(made from leftover tablecloth fabric from my pillow covers)

For this project, I used 1 piece of fabric (size will vary but it should be cut into a large rectangle), scissors, matching thread, matching ribbon (thin, not too wide), a taped safe and a sewing machine.

First, I cut out the fabric. In this example, I was wrapping a scrapbook so I used it to measure how big of a rectangle I needed.


I cut out the fabric based on the amount needed to cover the item with a little room on the sides and about 2 inches extra on each side (for the drawstring top). If you aren't good at eyeballing fabric and then cutting a straight line, you could use a measuring tape and dressmaker's pen then cut.


(Sorry that the picture is so dark, it's November after all)

After the piece is cut out, it's quite simple. Fold one edge under about 1/2 inch (less or more depending on the type of fabric that you have. You want enough space to run a ribbon through the gap though. Pin this edge down and sew it. I just did a zigzag stitch on mine (sew and stop fraying at the same time = awesome).


Then, pin down the cut edge and the bottom (which is now the edge that was not rolled under and sewed before. Sew this down then serge (or zigzag) the edges to prevent fraying.  Turn the bag inside out so that the good side is facing and all of the seams are on the inside. Poke the corners out with your finger.


Using a small knife, cut two holes close to the side seam then pass a ribbon through attached to a taped safety pin. Cut the ribbon and tie both ends to create a knot. Done!


Estimated time for this project: about 20 minutes for the sewing and 20 for the ribbon. This is seriously fast: cut, zip, zip. Sometimes, I do all of the sewing and then thread the ribbon into a pile of these bags another evening. 

Notes:
  • Try to make these out of a machine-washable fabric, just in case you wrap something that spills. Almost all of my bags are made out of leftover upholstry fabric. 
  • A serger is excellent for sewing up the edges.
Ideas:
  • I have tons of these to use for wrapping stocking stuffers and presents. They are all sorts of shapes and sizes. I even have tall long ones for magazines and small ones for gum and cough drops. 
  • I've reused fabric for making these: old dress shirts, pant legs, tablecloths, curtains, etc.
  • I've made my bags in a color scheme that matches my Christmas decor (red, cream, brown). That is totally possible! You could use a red fabric with red ribbon (or yarn).

Monday, November 21, 2011

Website discovery: Essortment, Ehow and WikiHow

I have just discovered the websites Essortment, Ehow and WikiHow and I have to share my favorite links of the moment. I love these three websites because the articles are written by people who have experience in how to do something thus they post it for all of the rest of us. I love knowledge-based articles!

These are my current favorite links on Essortment:
  1. 25 Places to Meet New People
  2. How to Make Your Own Facial Scrub or Mask
  3. Uses for Old Coffee Grounds
  4. The History of Root Beer
  5. Do it Yourself: Fixing Scratches in Wood Furniture and Trim
  6. Make Your Own Scented Body Oil
  7. Making Homemade Milk Soap
  8. How to Remove Sticker and Tape Goo
  9. Burning Patterns into Wood
  10. Laptop vs. Desktop
These are my current favorite links on Ehow:
  1. How to Make a Brown Sugar Lemon Body Scrub
  2. Sore Throat Pain Remedies
  3. Homemade Bath Salts
  4. Homemade Lip Balm - made from coconut oil!
  5. Make Curls Overnight Using Rags
  6. How to Live Thrifty
  7. 20 Holiday Trees Gone Wild
  8. Category: Sewing and Upholstry
  9. Techniques for Stenciling Furniture
  10. How to set Food Portion Sizes for Young Children
These are my current favorite links on WikiHow:
  1. How to Stencil Fabric
  2. How to Make a Glowstick
  3. How to Make a Candle with Essential Oils - bonus! makes body oil
  4. How to do Pranks with Garden Gnomes
  5. How to Set up a Sewing Room
  6. How to Make a Crop Circle
  7. How to Go Green at Work
  8. How to Avoid Workplace Flu
  9. How to Stop Procrastinating (and, even better, the Category)
  10. How to Get Rid of Junk Mail

Tuesday, November 8, 2011

Drawstring lunch bag out of leftover pant legs

Back in August, I blogged about the capris that I created for myself as I had no shorts. Well, I used the leftover pant legs that were cut off the pants to make a drawstring lunch bag for myself. It is very easy to do as it is just a square bag with a drawstring.


I made this the same way that I made my felt gift bags (so the directions are there) with these small differences:
  • I did a zigzag stitch around all of the inside seams to keep it from fraying.
  • I folded the top under twice to create a seam at the top but with enough space to pass a ribbon through. Once this was sewn down, I cut two holes and passed a ribbon through the same way that I passed the elastic through my remade white skirt. The ribbon acts as a drawstring.
Estimated time for this project: about one hour. It took some time to measure out the fabric that I needed and to sew up the bottom (same as the felt gift bags). It also takes time to pass the ribbon through the top.

Notes:
  • This could be made from almost any leftover fabric, I imagine. 
  • If I had made this from new fabric, I'd make it out of oilcloth.
  • To keep the ribbon in the bag, I knotted it at the ends but also close to the holes so that it didn't come out.

Felt gift bags

I absolutely love felt and I love finding new things to do with it! So, when Xmas was rolling around last year I had this great idea for reusable felt gift bags. These are actually quite simple, but they just require some time to measure and cut out.


For this project, I used 2 8x10 inch sheets of felt, scissors, pins, matching thread and a sewing machine. A seam ripper is also useful.

To start, I folded the first sheet of felt over and matched up the edges. I cut the felt on the fold.


These are the two face pieces. Next, with the second piece of felt I folded an edge lengthwise, about half way of the sheet of felt. I cut up the middle first then on the fold.


Now I am left with five pieces of felt: two fronts, two sides and a leftover piece which will be the bottom.


The bottom is tricky. There are no precise measurements. I took the leftover piece and lined up a front and a side piece to get an approximate measurement. I don't want for it to be too small or too big.


So, I laid a side piece on top of this leftover fabric and cut on the right-hand side for an approximate width measurement. I cut slightly larger than the side piece.


I also used a front piece to get a length measurement. I used the length of the front piece to gauge where to turn left and cut out my bottom piece.


Sewing

When sewing, it is done in this pattern: side 1, front 1, side 2, front 2. The bottom is the last thing to be sewn together.


I pinned side 1 to front 1 on the outside (this will not be turned inside out: I want the seam on the outside).


I sewed these two pieces together with about 2 milimetres of seam allowance (yes, it isn't much).


I now pinned side 2 to front 1 and sewed that together.


Here it is sewn together as front 1, side 1, front 2, side 2.


I pinned side 2 and front 1 together to form a "box".


Now for the fun part: the bottom. I started by matching the bottom piece up to one of the corners of the front/side pieces and I started to pin with about the same amount of seam allowance. This takes awhile and I was often pricked like a pin cushion while doing it.


I folded one of the sides down for the sewing and sewed the bottom piece on all of the way around.


Now it is done! I will do another post on how to fasten the bag as I haven't finished that part yet.

Estimated time for this project: about 30-45 minutes. It takes about 10 minutes to do the measuring (with a little more on figuring out that bottom piece). Another 10 minutes is spent on sewing the four side and front pieces together. The bottom is tricky and more time consuming.

Notes:
  • You could, of course, take measurements and make pattern pieces for a felt gift bag and use those instead of my primitive measurement method (notably on the bottom). Note to self: make pattern pieces.
  • I made my felt gift bags in brown, red and cream to match my Christmas colors.
  • If you have cream bags, you may have to use tissue paper or fabric to wrap the gift inside a little bit as it is a little bit see-through.
Ideas:
  • Why not make felt gift bags in your Christmas colors and reuse them every year for the holidays?
  • You could probably stencil some finished felt gift bags with fabric paint, like my burlap garland and burlap Christmas tree skirt.