Showing posts with label scrapbooking. Show all posts

Tuesday, October 9, 2012

Organization for scrapbooking scrap paper

I love scrapbooking but I have to say that the worst part is organizing all of the little bits that are cut off of the sheets of expensive paper. I spend half of my time trying to find white or cream-coloured scraps for journaling! So, I finally got so fed up that I made a connection between my empty poly expanding file organizer and my scraps: why not organize the scraps in the expanding file organizer?


There are 13 tabs in my paper organizer. I took a quick look at my paper scrap collection and came up with these categories:
  1. White
  2. Cream
  3. Yellow and Beige
  4. Red
  5. Pink and Purple
  6. Blue
  7. Green
  8. Brown
  9. Black
  10. Other: for all of the aqua, orange, grey and other colours that were not included
  11. Embellishments
  12. (and 13) Patterned: there were actually two pockets here so I organized it by the paper kits and the scrap pieces of patterned paper 
Then, it was a matter of organizing the paper scraps into the expanding file once I relabeled it according to the above categories. 


To this:


It took me about an hour to sift through my piles of paper scraps and organize them into these categories. Now I can get scrapbooking!

I hope my adventures in craft organization inspire you to do something similar! It's always great to bring order to chaos and get to work crafting instead of organizing the craft!

Sunday, June 3, 2012

Finished project: Egypt scrapbook

When I was 16 I went on the trip of a lifetime to Egypt with some other students. We had a fabulous time visiting the Pyramids, the Karnak temple, the Valley of the Kings, and other sites. We spent time in Cairo, Luxor, Edfu, Aswan and Alexandria. I can honestly say that it was the most fun that I have ever had on a trip -- to date!

After that trip, I resolved to make a scrapbook of my memories. Over the years I did a page here and there but it wasn't until this year that I realized that I had to finish it. It took me 12 years but now I can proudly say that the scrapbook is finished! The last thing that I did was a fabric scrapbook cover.

Here are some shots of it:


My title page to the Egypt Trip


Karnak Temple


The Valley of the Kings


The Egyptian Museum

Scrapbook cover

To finish my Egypt scrapbook, I made a fabric scrapbook cover for it. I really like this one better than the one that I made out of T-shirts!


For this project, I used approx. 1/2 m canvas-weight fabric, 1 spool matching heavy-duty thread, 1 button, 18 inches of matching yarn, a sewing machine, a hand-sewing needle, a measuring tape, a dressmarkers pen, pins and scissors.

First, I measured my scrapbook binder. This is a simple 1-inch binder with plastic page protectors.


I measured length (21 inches)...


And I measured height (11.5 inches).


I used those measurements on the wrong side of my fabric and marked them three times from the top to the bottom with a dressmakers pen. I allowed about 0.5 cm on both sides for seam allowance. I cut out a piece that was 22 inches wide by 12.5 inches tall.


Then I measured the inside of the binder (9 inches).


I marked this on the fabric and cut out a piece that was 9 inches wide by 12.5 inches tall for the inside.


I had three pieces...


Sidenote: I have to mention these AWESOME coconut shell buttons that I found into Wal-mart...


So, the finished product will look like this on the inside. First thing to do is sew down the facing edge of the two inside pieces. 


I did a double seam...


Then, I pinned the two inside pieces to the larger outside piece. This was pinned right side to right side so that it would turn inside out correctly.


Then I turned it inside out...


voila!


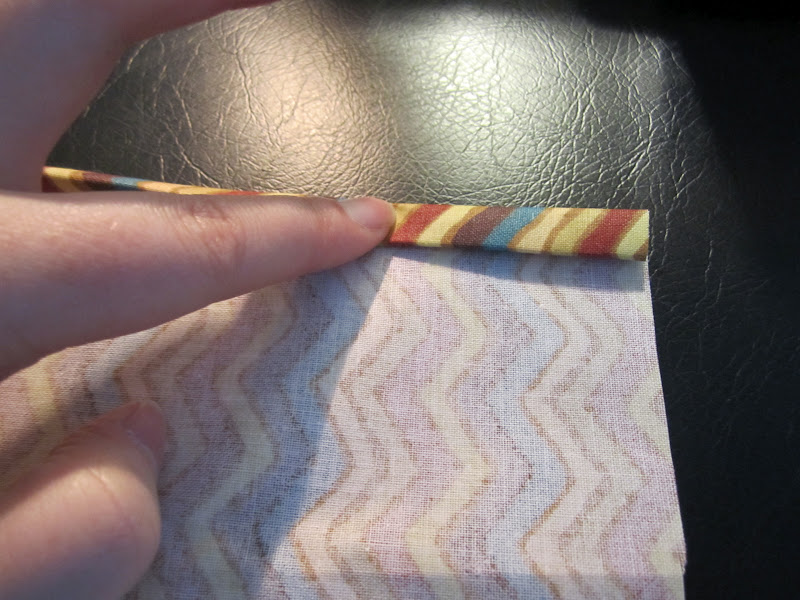
Now to finish the seam for the spine. I simply folded it down and pinned it at the top and the bottom then sewed them down.


Here it is, almost done!


Now for the button. I sewed it on the front...


And I hand-sewed the centre of the 18-inch string of brown yarn to the back. 


I then wrapped the two strands of yarn around the button on the other side of the binder three times.


I pulled the yarn back and tied a knot where I was going to cut it.


I tied three knots to keep it strong.


Then I cut off the excess. Done!

Estimated time for this project: about 1 hour, perhaps a little more for the sewing of the button and the yarn.

Saturday, January 28, 2012

How to cover a scrapbook with T-shirts

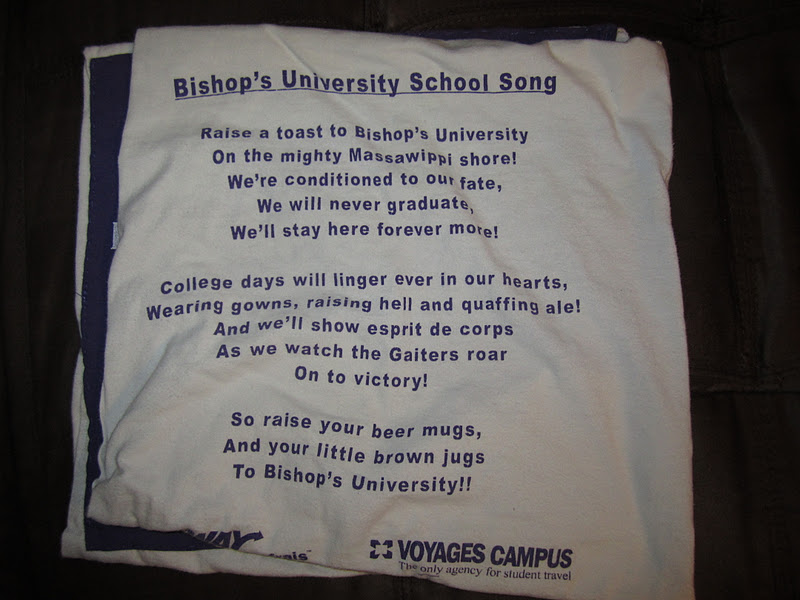
This is my university scrapbook. I got this kit for Christmas one year and I wasn't going to let it sit there because I didn't like the cover. I kind of decided a long time ago that I was going to cover it with something then I realized that I still had two of my old t-shirts from university.

 (before)


 (after)

Then I got this idea: use the T-shirts to cover the scrapbook. Brilliant! You'll have to pardon the lack of tutorial photos though as I did this project before I started this blog.

For this project, I used two old T-shirts, matching thread (in this case, purple and white), a sewing machine, scissors, and the scrapbook that needs to be covered. A measuring tape and white or blue dressmakers pencil also came in very handy.

Cutting:

As I mentioned, please pardon the lack of photos for this part. What I did was measure the height and width of the scrapbook then put those measurements on the front and back of each T-shirt, marking the edges with the dressmaker's pencil. Then, I cut out 4 squares with at least 1 cm seam allowance on all sides.

Sewing:

As there was screen printing on the front and back of both T-shirts, I decided to have the white shirt on the outside cover and the purple shirt on the inside cover. I wanted to keep the print facing out. 

I pieced together the two white pieces for the outside cover and pinned them together on the wrong side where the seam for the spine would be and sewed them up on the sewing machine.


Next, I took the two pieces of the purple shirt (which will be the inside) and I pieced it onto the white shirt to see where the seams would be. I then pinned the seam facing the inside spine and sewed it down with matching thread on the sewing machine. For one piece this was the far right side, for the other one it was the far left.


Then came the easy part. I turned both the white and purple shirt pieces inside out and pinned the front cover pieces on the wrong side up the seam with 1 cm seam allowance. I sewed this up on the sewing machine then did the same with the other two pieces. I now had a white outer cover and purple inner cover.


Again, I apologize for the lack of photos for this tutorial but I do have another scrapbook to cover and I will take pictures of that one.

Estimated time for this project: about 1 hour.

Notes:
  • This is really easy when you use measurements of the scrapbook that needs to be covered. 
  • If you want to serge any edges that is fine too, notably the edges of the white shirt around the spine. 
  • This cover is washable as the T-shirts were washable. 
Ideas:
  • The possibilities for this are endless. Use your kids' old t-shirts to cover a small scrapbook for them, use your favorite t-shirts from high school to cover a high school scrapbook, etc. If you get t-shirts from a conference or camping trip that you want to remember, use them to cover the scrapbook. 
  • You could even take a white t-shirt, paint it or stencil it then use it to cover a scrapbook. 
  • You can dye fabric and use it to cover a scrapbook.

Saturday, November 5, 2011

10 Great Presents for your Parents

I like to spoil my parents at Xmas. Each year I like to spend time thinking of some great things to give my parents for the holidays. These are some of the great ideas that I have thought of:
  1. Homemade Videos on DVDs: take all of the videos that your parents took of you when you were a child and take them into a camera or video store that migrates from a video to a DVD. Get them to digitize the video and burn it onto a DVD for you. If you can, get the digital copies of the video as well. 
  2. Scrapbooks: take pictures of when you were young or from the past year and create a scrapbook for your parents. 
  3. Digital Picture Frame: load up a digital photo frame with pictures from the past year and let your parents enjoy seeing what you have been up to - this is a bonus if you have kids. Whenever you have new photos or visit home, load up the frame with new photos for a gift that keeps on giving. 
  4. Restored Old Family Photos: scan them at a very high resolution and either get a photo editor to restore them or you can try it yourself with a program like Picasa or Adobe Photoshop. Get the photos developed and frame them for a surprising gift.
  5. Genealogy scrapbook: building on scrapbooks and restored old family photos, why not create a scrapbook detailing your family history complete with old photos, stories and old recipe cards.
  6. His and her scarves: knit a scarf set: hat, scarf and mitts for each parent. You can use a different pattern for each of them in their favorite colors.
  7. Recipe book: if your parents never wrote down their recipes, perhaps you could do it for them. Write them down and assemble them in a journal, perhaps complete with photos. You can also do it in a spiral notebook with tabs to divide meals, desserts and holidays.
  8. Old TV shows and movies: buy them a collection of movies or TV shows that they grew up with. Movie studios are releasing many older TV shows on DVD so it's great for your parents to relive their childhood or youth. 
  9. Lessons or Classes: pay for them to take a class in a topic that interests them, or perhaps a topic that they've wanted to learn more about. 
  10. Time: turn off the TV and put the computers away then spend the afternoon playing all of the games that you grew up on: Monopoly, Sorry, Battleship, Checkers, etc. 

Thursday, October 13, 2011

10 cheap, homemade present ideas for kids

I like making my gifts because I think that they mean more to the recipient. Of course, gift cards and toys are always acceptable and I am not saying that everything has to be homemade, but these are the gifts that they will most likely remember and keep.
  1. Scrapbooks: I am making this for my nephews this year and I hope that they will enjoy it for years to come. I also plan to do this with my kids: each one of them can get a scrapbook detailing the past year for Xmas so that when they leave the nest they have these gifts. If you don't have time to make a scrapbook, a photo album always works too.
  2. Re-molded crayons and coloring books: what a great way to use up old crayons! The blog notes that this works best with Crayola or another good name brand of crayons and perhaps not with cheaper Dollarama crayons.  
  3. T-shirt tote bags made from their favorite t-shirt which was stained, too small or wore to rags. This way they can still have happy memories of that shirt for years to come, even if it doesn't fit.
  4. Clothes: whether bought or homemade, they are always welcome, especially if their favorite super hero or cartoon character is featured. You can always take a plain t-shirt and buy some fabric with their favorite super hero or celebrity on it. Cut out an image from the fabric and sew it onto the front of the plain t-shirt for a custom shirt that they will love. This is even better if you make a pair of pajama pants to match.
  5. Room sign: make a sign for the door into their room. I used to do this in camp on a piece of wood that we painted with our names and splattered our favorite shades of paint all over it. I still have it and I remember thinking when I was a kid that it was the coolest thing ever that I could display on my door.
  6. Knitted or crocheted blanket: you can make kids a cozy blanket out of their favorite colors. I made one of my nephew and I made it big enough for him to use until he's in his teens. I did a subtle ribbing pattern on it.
  7. Christmas ornaments: make one every year since your child was born with the date on it so that when they grow up and leave the house, they already have a small collection of ornaments for their own tree. This could be as simple as wooden snowflakes that you have painted white and wrote the name and date with a gold pen on the back. You could use that same gold pen to outline snowflake details on the front too.
  8. Room decorating: all kids like to decorate their room. What about if your Christmas gift to them was a redecoration of their room? That means paint, wallpaper (maybe) and perhaps a few matching items for their room. You could wallpaper the back of the door or the back space of the bookshelves for dramatic effect.
  9. Personal plates: do up their own place setting with a cup, mug, plate and silverware. You can buy these now in craft stores and paint them yourself then fire then in the oven or glaze them. Do a nice design on them so that they look forward to eating everything on their plate to see that design (we wish!).
  10. A candy or cookie bag: make their favorite cookies or homemade candies, bag them up and put them in their stocking for Christmas morning. I can remember fudge, truffles and snickerdoodle cookies being my favorite and we only ate them at Christmas.

Monday, October 10, 2011

Using up small scraps of paper when scrapbooking

Ahh, scrapbooking. A past time that I would love to spend more time on. I have glorious visions of all of my photos carefully catalogued in stacks of scrapbooks although I don't think that would ever happen. However, whenever I do sit down to scrapbook I always have the issue of what to do with the small scraps. I feel very guilty if I toss them into the recycling bin so I always try to find ways to reuse them. But what on earth can you do with small scraps of paper? Here are 10 things that I can think of that may help me and you towards greener scrapbooking. 


  1. Use it when journaling (labelling photographs or detailing events). If you want to mount white paper, use a piece of colored paper below and cut to the proper dimensions.
  2. Use it for the titles of pages. You can mount white paper and use the colored piece underneath.
  3. If you only have small scraps, cut them into photo edges and add them to your page.

  4. If you have larger pieces, use it to mount photographs with a border behind.
  5. Again, for larger or long, skinny pieces, use it as a border on the edges or on the page itself.
  6. Use small scraps to cut out letters. I find it easier to draw the letter on the paper first and cut out afterwards. You can also draw the letters on white paper and mount them on colored paper scraps.
  7. Use a scrap to create a paper button. Cut it out into a button shape and draw the four holes in the middle and trace an “edge”. Then, use it like a button to pin a tag on the page.
  8. If you have small, ripped scraps, use it behind photographs for some background detail.
  9. If you have small squares, use them on a page for a diamond detail. This works well if the scraps are in a color that matches the layout (ex. Brown paper with green leaves goes well with green or white scraps).
  10. Use scraps as “tags” on pages. You can cut it out to look like a tag and journal in a title and details.

Friday, August 26, 2011

Introduction

After many years of avoiding blogging, I finally caved in and created one.

So here you will find the musings of a busy mind. I plan on sharing all of my projects with you with instructions on how to make them. I love to make things and I'm always looking for new ideas. I am interested in upcycling and restyling clothes, knitting, scrapbooking, and cross stitching. I am also very interested in becoming more green and I am looking for ways to use less water, to recycle, to compost, etc.

So, prepare for a Canadian point of view!