Showing posts with label unisex. Show all posts

Tuesday, September 13, 2011

Laptop Sleeve for Men

We really like technology but we want to protect it. So, I made a laptop sleeve for my husband's laptop to protect it whenever he travels or for general protection. This fits a thin, 13-inch computer and can be adjusted.

I added a stripe to this but that is optional.


Needle size: size 8 (5.0 mm) 29 inch circular
Yarn: RedHeart Super Saver yarn

Cast on 90 stitches in main color.

Start rib pattern for 6 rows.

Rib pattern:
Row 1: knit two, purl two, repeat until the end of the row.
Row 2: purl two, knit two.

At the end of the 6 rib rows (ending on the RS), switch to the WS. Knit in stockinette by purling this row and knitting the next. After 8 rows, switch to your second color on the WS (which is optional). Knit in stockinette for 6 rows. Switch back to main color on the purl side. Knit in stockinette (purl one, knit one) for 11 more inches in the main color. Bind off. Sew up the seams and weave in ends. 


 Estimated time for this project: about 1 week (7 days) if you work on it for one hour every day.

Notes:
  • I didn't do this in the round (or join the stitches) but I will for the next one that I make. The directions wouldn't differ much. 
  • I made this for a man hence the grey and green colors, but this could easily be made with girly colors. 
  • The stripe is not necessary. It is possible to omit that part. I did that to make it look like a real sock.

Saturday, August 27, 2011

Apron from an old men's dress shirt, part 2

So here is part 2 - the sewing part. You'll need a sewing machine with a matching (or contrasting) thread, a seam ripper, scissors and pins.

First, take the back of the apron and serge (or zipper-stitch) all of the edges.


Next, pin down the chest (not folded under) and sew down. Pin down each side and sew down, then do the same with the edges. Now the entire back has become an apron with clean sewn-down edges:


Next, take the button strip and serge (or zipper-stitch) down the edge with a sewing machine. Fold the seam allowance over onto the button strip and pin down. Sew down.


Pin the new neck strap to the top of the apron on the wrong side (the side you don't want people to see with all of the serged or zigzagged edges) on the far left and far right sides then zigzag into place, backstitching many times.


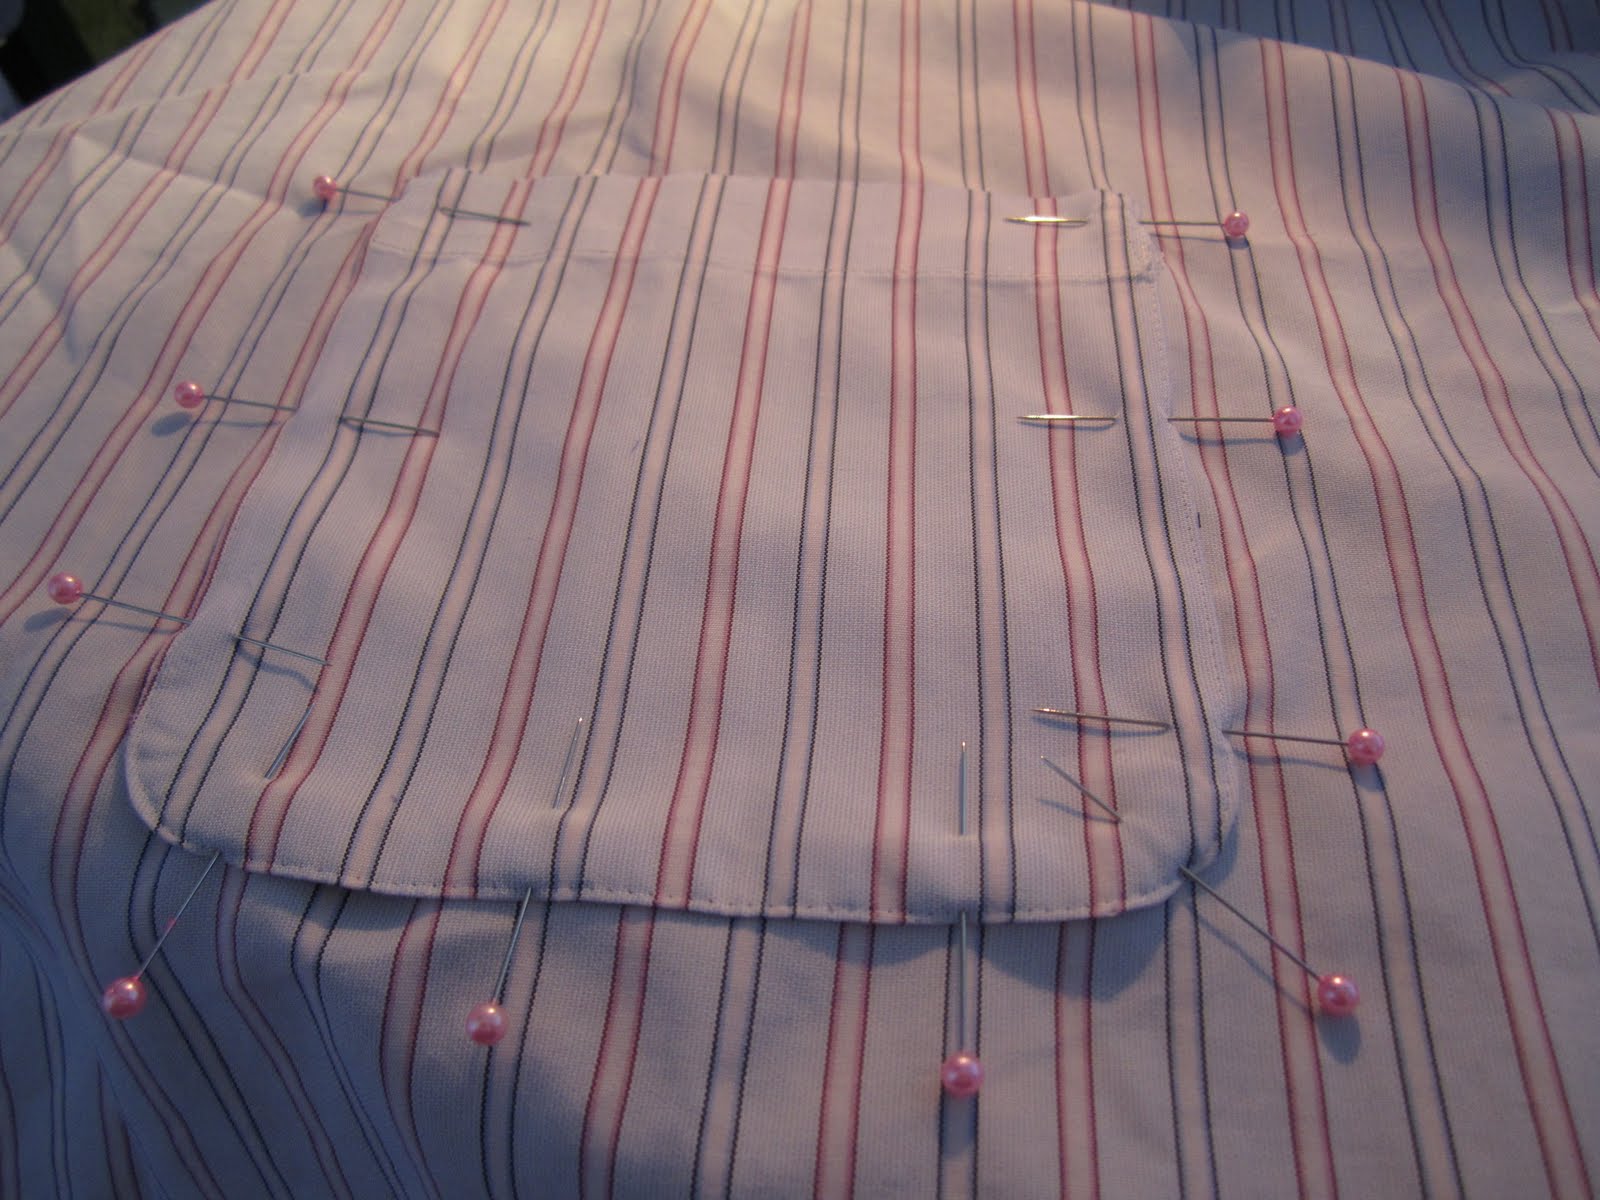
Now, take the pocket from the front of the shirt. On the right side of the apron (the clean side that you want people to see), pin the pocket into place. What I did is i looked for the fold (as I had folded this apron in half) and then centred the pocket over the fold. Sew the pocket to the apron front.


Last, we have the two waist straps. You can iron these and fold in the sides about 2cm like double bias tape but what I did is I folded and pinned at the same time. This is more difficult of course, I highly recommend ironing. Essentially, you need to fold the edges under about 2cm on both sides then pin the two sides together like so:


And so:


Fold the waist straps as so and pin down. When you reach the edge it becomes more difficult as you need to fold the sides and the end under and then pin. Once it is pinned down, sew on the far edge of the pins so that the stitches are not noticeable.


Last, pin and sew the waist ties onto the wrong side (side with the serged edges) of the apron, backstitching many times:


Here is your finished product!


Estimated time for this project: about 25 minutes to cut out the pieces and 1 hour to sew together (1h25 minutes).

Notes:

  • This apron is rather large and I find that it fits my husband much better than myself so a more feminine version will be coming. 
  • I didn't iron anything when I made this apron so it was wrinkly. Ironing certainly helps. 
  • The position of the pocket is not fixed. You can put it wherever you want or not use it all together.
  • I don't have a serger so I used the zipper-stitch on my sewing machine. I have washed the aprons a few times and did not notice any fraying.  

Ideas:
  • What about using thread in a contrasting color?

Friday, August 26, 2011

Apron from an old men's dress shirt, part 1

This is a project that I made a few weeks ago. Instead of buying an apron, I decided to make one out of an old men's dress shirt that my husband had lying around.

So first, start out with an old men's dress shirt like this one:


Start with the following:
1. Remove the buttons with a seam ripper and add to a button jar (if you have one).
2. Cut off cuffs and the collar.
3. Using the seam ripper, take off the pocket and keep it.
4. Cut the shirt into pieces at the seams so that you have two fronts, two sleeves, one back and one pocket.

You will be left with this back:

Now it's time to use these pieces. First, fold the back of the shirt over so that the former seams are touching. Cut a line from the former arm-pit to the neckline and cut the neck like so:


Next, cut two waist straps from one of the arms like so (don't mind the wrinkles):


Lastly, cut the button strip off of one of the fronts which will be used as a neck strap. I cut one inch away from the button strip for seam allowance.

That is all of the cut pieces to make this apron! In the next post, I will write how I sewed it all together.