Showing posts with label sewing. Show all posts

Sunday, November 25, 2012

Finished project: another felt pillow cover for Christmas

I had already completed two felt pillow covers earlier this year except for this one. It took a little while longer as I had to do the little holes in the centre by hand.


I made this the same way that I made the other two covers. Festive, eh?


Sunday, June 3, 2012

Scrapbook cover

To finish my Egypt scrapbook, I made a fabric scrapbook cover for it. I really like this one better than the one that I made out of T-shirts!


For this project, I used approx. 1/2 m canvas-weight fabric, 1 spool matching heavy-duty thread, 1 button, 18 inches of matching yarn, a sewing machine, a hand-sewing needle, a measuring tape, a dressmarkers pen, pins and scissors.

First, I measured my scrapbook binder. This is a simple 1-inch binder with plastic page protectors.


I measured length (21 inches)...


And I measured height (11.5 inches).


I used those measurements on the wrong side of my fabric and marked them three times from the top to the bottom with a dressmakers pen. I allowed about 0.5 cm on both sides for seam allowance. I cut out a piece that was 22 inches wide by 12.5 inches tall.


Then I measured the inside of the binder (9 inches).


I marked this on the fabric and cut out a piece that was 9 inches wide by 12.5 inches tall for the inside.


I had three pieces...


Sidenote: I have to mention these AWESOME coconut shell buttons that I found into Wal-mart...


So, the finished product will look like this on the inside. First thing to do is sew down the facing edge of the two inside pieces. 


I did a double seam...


Then, I pinned the two inside pieces to the larger outside piece. This was pinned right side to right side so that it would turn inside out correctly.


Then I turned it inside out...


voila!


Now to finish the seam for the spine. I simply folded it down and pinned it at the top and the bottom then sewed them down.


Here it is, almost done!


Now for the button. I sewed it on the front...


And I hand-sewed the centre of the 18-inch string of brown yarn to the back. 


I then wrapped the two strands of yarn around the button on the other side of the binder three times.


I pulled the yarn back and tied a knot where I was going to cut it.


I tied three knots to keep it strong.


Then I cut off the excess. Done!

Estimated time for this project: about 1 hour, perhaps a little more for the sewing of the button and the yarn.

Sunday, March 4, 2012

The Knitting Needle Case - made from scraps!

I was going through my fabric bin and I discovered the leftover cut shirt from my fooler shirt project and a leftover pillow cover that I had meant to sew up. Then, I got a wild idea for organizing my knitting needles: a roll-up knitting needle case. I was also inspired by projects in fabric books and the make-up brush case from Sew 4 Fun that I found pinned to Pinterest.


For this project, I used home decor-weight fabric and an old button-up cotton shirt. For the case, I used two 16 by 16 inch squares along with two more pieces that measured 4 by 16 inches and 8 by 16 inches. These two smaller pieces will be the two levels of "pockets" that hold the needles. I cut "bias tape" from the button up shirt that measured 3 inches wide but came in various pieces (there are pictures below). I also used my sewing machine, matching thread, pins and a measuring tape.


First, I measured the pieces and did some adjusting where necessary. I also cut the first piece of "bias tape" and used it as a guide for cutting the rest of the shirt into strips. I pinned and sewed them together to form a long strip of bias tape.


(It's hard to see in the pic but I have one strip laid over the shirt as a rough measurement and I am cutting up the side)


Then, I did the zigzag stitch on the cut edge of each of the dividing pockets, then pinned and sewed them down for a clean edge.


 Once the two cut edges were folded and sewed down, I placed them on the good side of one of the larger 16 by 16 squares like so, pinned along the edges and sewed all three layers together. 


I started to measure the pockets now. I used the measuring tape to create lines at 2 1/2 inches, 2 inches then 1 1/2 inches lengthwise and sewed down through the two layers to the bottom to create pockets for knitting needles. For each measurement, I marked it with a pin and sewed down to the bottom in a straight line.


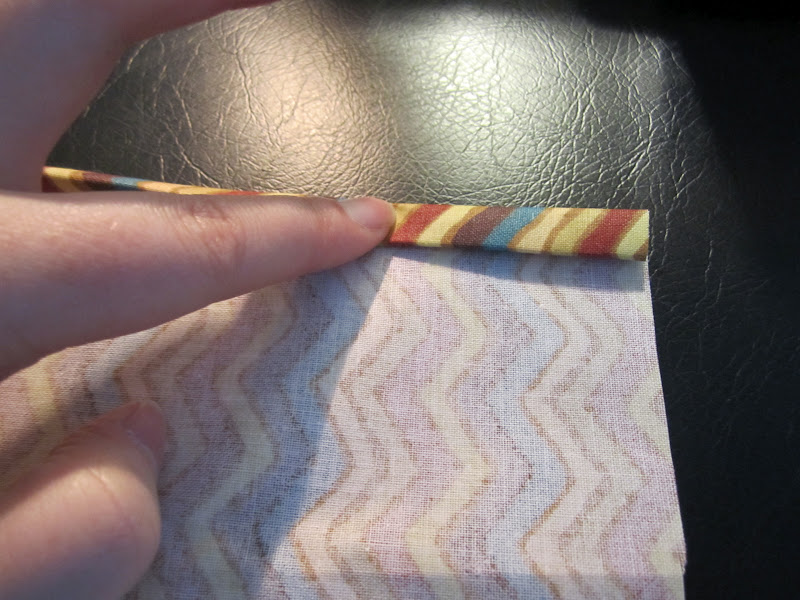
Once the pockets were created, I had to create the bias tape. I ironed it and pressed each side about 1 cm on each side to create bias tape. Then I started pinning it to around the edge of the knitting needle case.


Then, it was done!


The last thing to do was to create a tie with some leftover shirt bias tape. I simply folded it over and sewed it together.


Estimated time for this project: about 1 hour. This seriously did not take long! Most of it was spent on the ironing and bias tape.

Notes:
  • This can be done with any color combination and with or without bias tape. 
  • A serger can always be used whenever I noted that I used the zigzag stitch. 
  • I'd use a heavier-weight fabric for this project like home decor or upholstery weight. Quilting and fashion-weight fabrics aren't stiff enough to last with a project like this. 

Ideas:
  • Why not make one out of leftover jeans or curtains?
  • Contrast stitching can also be done. Perhaps a white fabric with bright blue bias tape and stitching?
  • Why not stencil or embroider each pocket with the size of the needles? (Ex. US1, 2, 3, etc.)